
Registry Persistence Detection
Learn to use the AutoRuns PowerShell module to detect persistence mechanisms that use the Registry.
easy

To access material, start machines and answer questions login.
Set up your virtual environment

One crucial step that malware does upon successful execution on a lab machine is to ensure that it can stay there even after a reboot or removal attempt. This is possible using various techniques, collectively called "malware mechanisms".
This room will give you an overview of these techniques and introduce a tool that can help detect them and aid in removal.
Learning Objectives
- Learn how malware persists in a machine
- Learn how malware uses the Registry as a mechanism
- Learn how to use the AutoRuns module to detect and remediate mechanisms
Connecting to the Machine
We will use the Lab Machine provided to complete the tasks in this room. You can start it in split-screen view by clicking on the green "Start Lab Machine" button on the upper right section of this task. If the is not visible, use the blue "Show Split View" button at the top-right of the page. Alternatively, you can connect to the using the credentials below via "Remote Desktop".
| Username | Administrator |
| Password | Passw0rd! |
| IP | MACHINE_IP |
The term "malware " can be defined as:
"Behaviors that enable malware to remain on a system regardless of system events, such as reboots."
There are multiple ways malware can gain . The technique/s used vary depending on the targeted operating system, ease of implementation, level of stealthiness, or, sometimes, based on the preference of the malware author. Examples of these techniques would be modifying an operating system's , installing malicious configurations, or hijacking execution flow.
In Windows, the most common and easiest-to-implement technique is the abuse of Windows Registry Run keys.
The Windows Registry is a database of low-level operating systems and application settings. The Run keys are specific keys within the Registry that contain a path that runs every time a user logs on, and they are listed below:
- HKEY_CURRENT_USER\Software\Microsoft\Windows\CurrentVersion\Run - Run path when the current user logs in
- HKEY_LOCAL_MACHINE\Software\Microsoft\Windows\CurrentVersion\Run - Run path when any user logs in
- HKEY_CURRENT_USER\Software\Microsoft\Windows\CurrentVersion\RunOnce - Run path when the current user logs in, then delete
- HKEY_LOCAL_MACHINE\Software\Microsoft\Windows\CurrentVersion\RunOnce - Run path when any user logs in, then delete
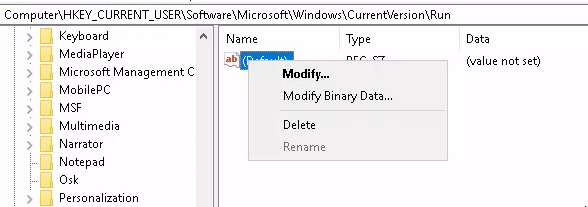
To view these keys, open the Registry Editor by searching for "Regedit" on Windows Search or double-clicking on the Regedit icon pinned on the Windows taskbar.
This is what the Registry Editor window looks like:
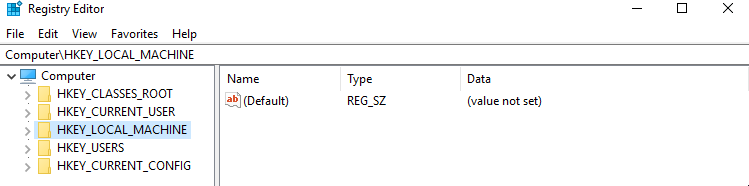
If you want to view the value for one of the Run keys, expand the folders and their subfolders until you reach the key you are looking for. For example:
- HKEY_LOCAL_MACHINE > Software > Microsoft > Windows > CurrentVersion > Run
What is the value "Data" of the suspicious registry entry that runs during startup?
What string is displayed on the console when the suspicious file runs?

           PS C:\> Get-Command -Module AutoRuns
CommandType     Name                                               Version    Source
-----------     ----                                               -------    ------
Function        Compare-AutoRunsBaseLine                           14.0       AutoRuns
Function        Get-PSAutorun                                      14.0       AutoRuns
Function        New-AutoRunsBaseLine                               14.0       AutoRuns
PS C:\> Get-Help CHANGETHIS
What AutoRun function is used for creating a baseline file from Autoruns artifact(s)?
What AutoRun function is used for comparing two baseline files of Autoruns artifact(s)?
AutoRuns has a function called Get-PSAutorun that will list all possible auto-start mechanisms available on the machine. It makes this list by looking at categories like the Registry, Windows services, entries, hijacking, and more. Because of this, the output of the command will return many results that might be challenging if not adequately filtered.
           PS C:\> Get-PSAutorun

Path          : HKLM:\System\CurrentControlSet\Control\Session Manager
Item          : BootExecute
Category      : Boot Execute
Value         : autocheck autochk *
ImagePath     : C:\Windows\system32\autochk.exe
Size          : 956416
LastWriteTime : 11/6/2022 4:24:46 AM
Version       : 10.0.17763.1697

Path          : HKLM:\SOFTWARE\\Microsoft\Windows\CurrentVersion\Explorer\ShellServiceObjects
Item          : {003e0278-eca8-4bb8-a256-3689ca1c2600}
Category      : Explorer
Value         : C:\Windows\system32\shell32.dll
ImagePath     : C:\Windows\system32\shell32.dll
Size          : 22153696
LastWriteTime : 11/6/2022 4:25:16 AM
Version       : 10.0.17763.1911

Path          : HKLM:\SOFTWARE\\Microsoft\Windows\CurrentVersion\Explorer\ShellServiceObjects
Item          : {3BF043EF-A974-49B3-8322-B853CF1E5EC5}
Category      : Explorer
Value         : C:\Windows\System32\SndVolSSO.dll
ImagePath     : C:\Windows\System32\SndVolSSO.dll
Size          : 823808
LastWriteTime : 11/6/2022 4:25:22 AM
Version       : 10.0.17763.652

...
Piping the result of the command above to the Out-GridView (opens in new tab) cmdlet can make the output more readable.
PS C:\> Get-PSAutorun | Out-GridView
The above command will open a new window showing the following output:
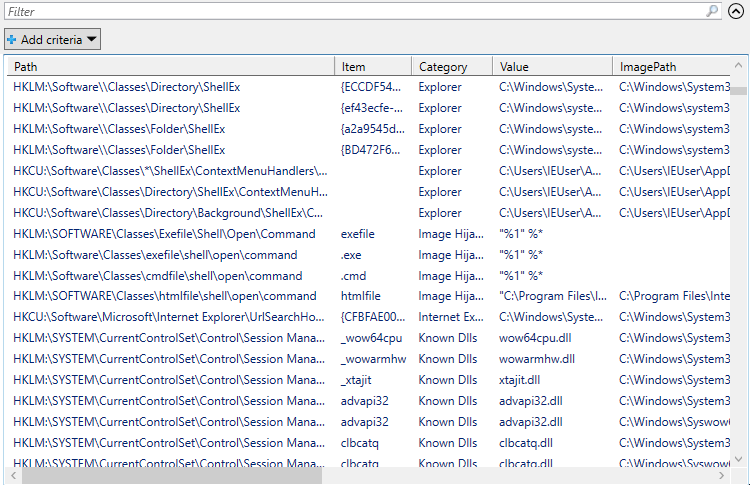
Note: Wait for a couple of minutes for the tool to finish populating the results
The results above list all possible places a program can run on start-up. You can filter the results by specifying keywords in the "Filter" bar at the top of the window. You can also sort the results by clicking on the column headers.
We can specify parameter switches when calling the function to filter the result according to the previously mentioned categories. Open a new window, and use the Get-Help command to list the available parameters.
PS C:\> Get-Help Get-PSAutorun -detailed
How many entries are outputted using the parameter switch from the previous question?
What parameter switch is used for filtering for artifacts related to printer driver and status monitors?
How many entries are listed in the output using the parameter switch from the previous question?
What parameter is used to add a new column to show whether a file is digitally signed?
Searching all categories, how many entries have the "Signed" column set to "false"?
Try to answer the previous question with just Powershell and without using Out-GridView.
While filtering via parameter switches helps reduce the output, there is still a lot to go through. This is where the baseline creation and comparison feature of the AutoRuns module is helpful, as only the entries that differ from the baseline are shown in the results.
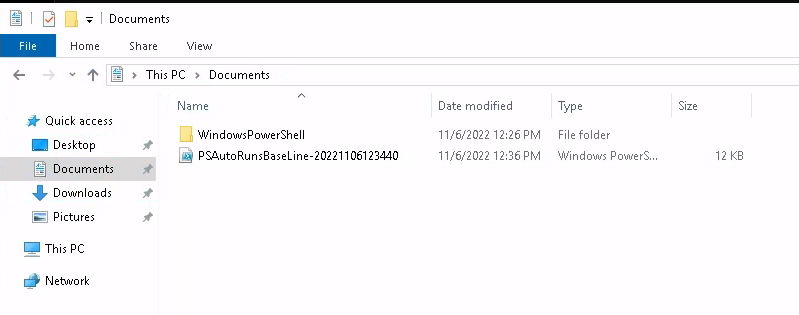
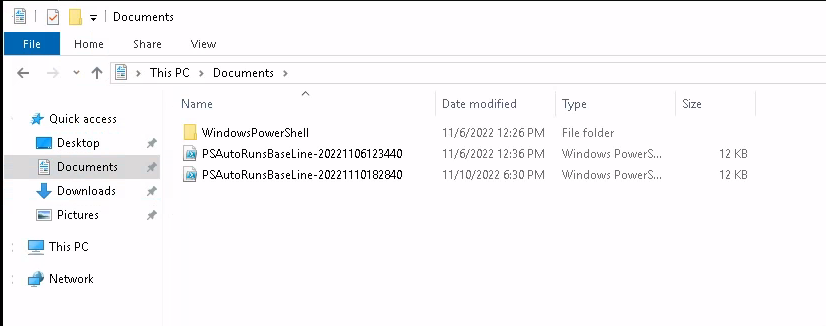
After creating this room's machine, a baseline file was generated and saved in the ~/Documents folder. This file serves as a snapshot of the Registry before the malware ran.
To check what Registry keys were changed, a new baseline file needs to be created using the New-AutoRunsBaseLine function.
           PS C:\> Get-PSAutorun -VerifyDigitalSignature |
>> Where { -not($_.isOSbinary)} |
>> New-AutoRunsBaseLine -Verbose
When done, the new baseline file is added to the ~/Documents folder.
The two baseline files can now be compared using the following command:
PS C:\> Compare-AutoRunsBaseLine -Verbose | Out-GridView
Note: Make sure there are always two baseline files in the ~/Documents folder when comparing. Delete the other files you do not need to avoid confusion.
What is the value data of the suspicious Registry entry from question #1?
What is the category that AutoRuns assigned to the entry from question #1?
What string is displayed on the console when the suspicious file ran?
We can now take the necessary steps to remove the malicious registry keys and files we found. In this case, it is as easy as deleting or modifying the entries via "RegEdit" and ensuring they are gone after a reboot.
Hopefully, this room has given you an idea of how malware uses the Windows Registry to maintain on a lab machine. While there are other techniques that malware uses, the same tool can be used in detecting most of them.
Ready to learn Cyber Security?
TryHackMe provides free online cyber security training to secure jobs & upskill through a fun, interactive learning environment.
Already have an account? Log in