
REmux The Tmux
Updated, how to use tmux guide. Defaults and customize your workflow.
info

To access material, start machines and answer questions login.
Set up your virtual environment

Tmux is known as a terminal multiplexer. That allows you to craft a single terminal however you need it.
Here is a machine you can use to complete the room if you don't have tmux installed on your local machine. Also comes with all the code and plugins needed for future tasks.
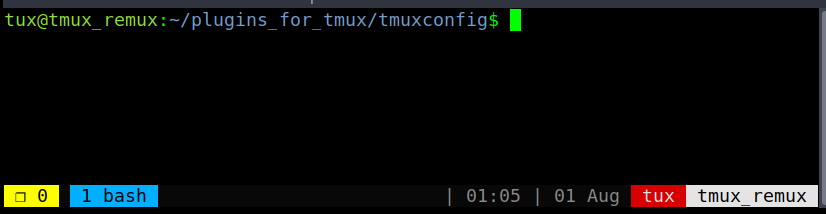
Username: tux
Password: tmuxwithremux
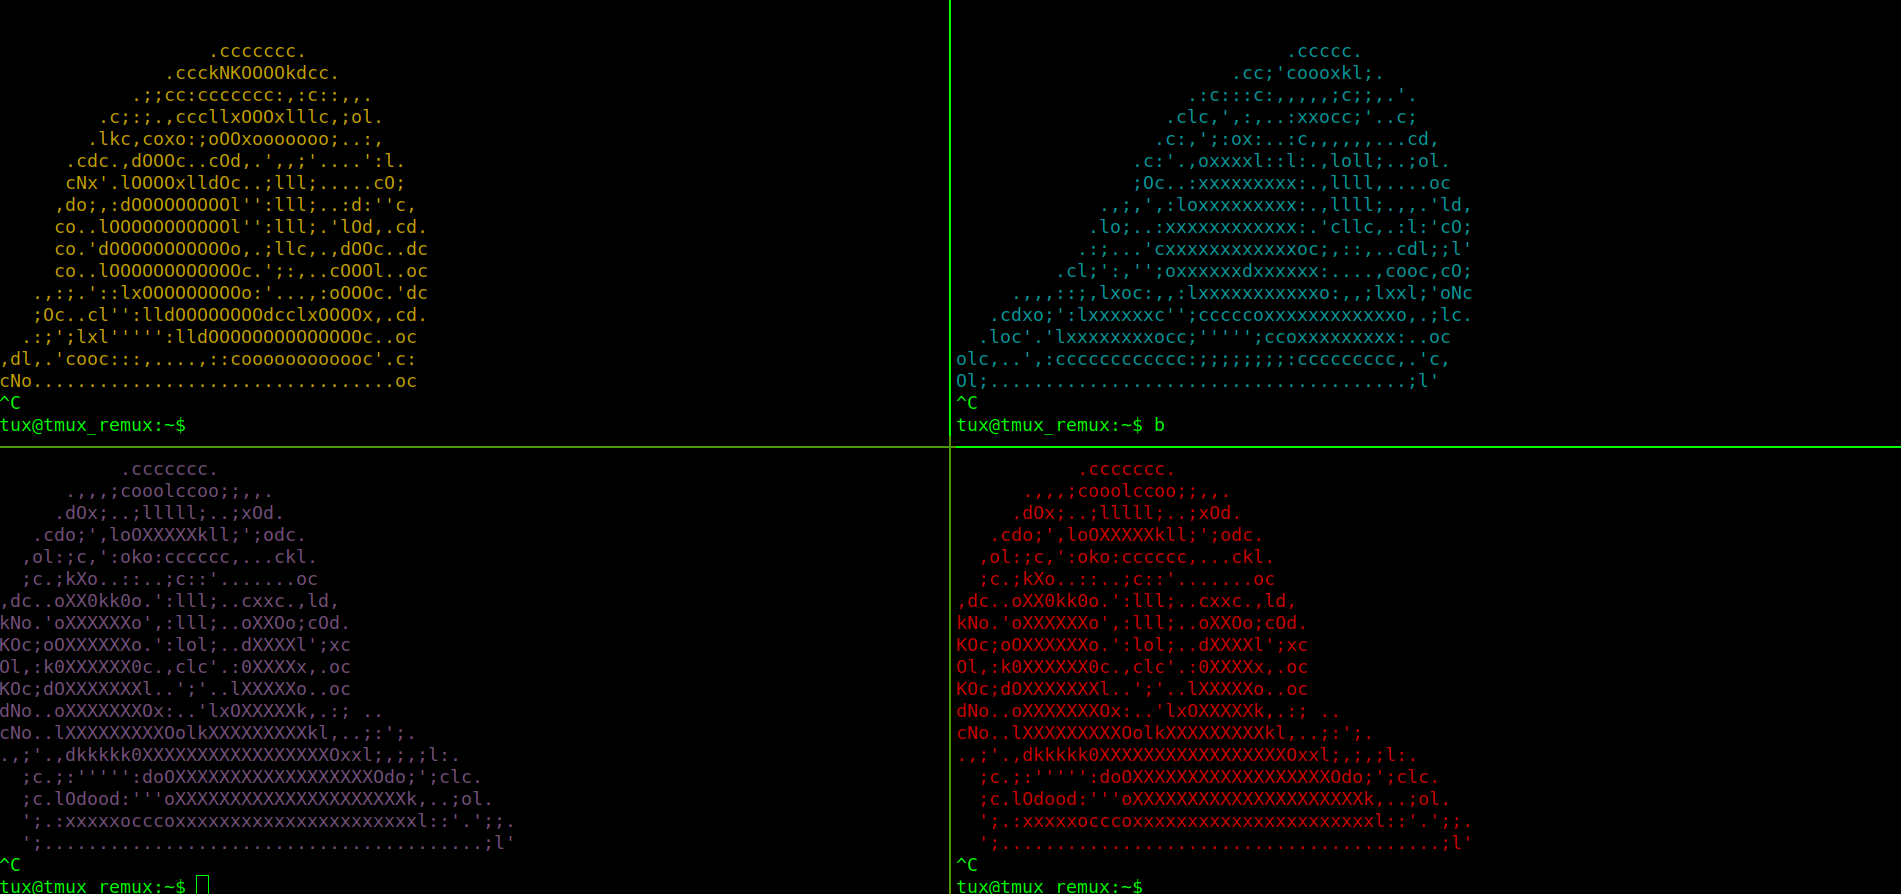
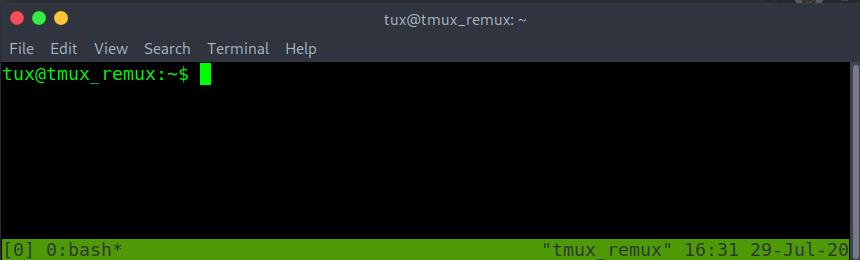
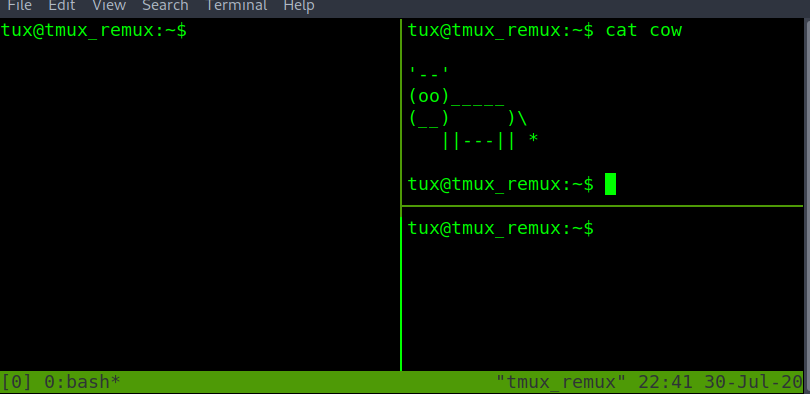
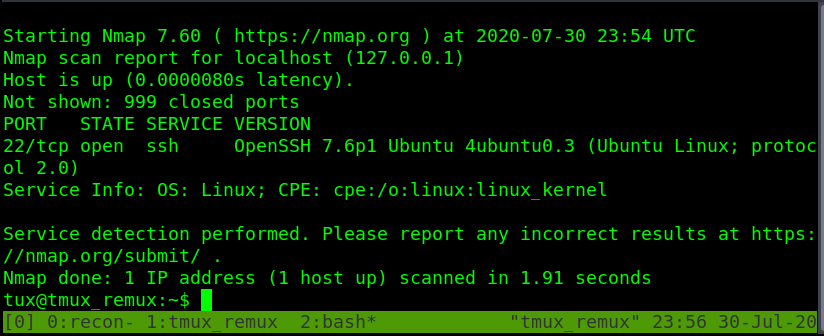
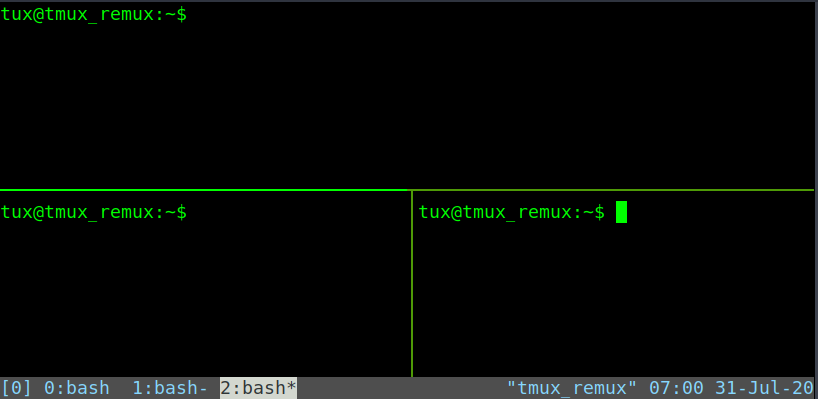
To start a new tmux session just run the tmux command with no arguments. The first session create will have the name "0". By default, tmux status bar will be green. With session name on the left. Windows in the middle and window names in the middle. Hostname, time, and date on the right of the bottom green bar.
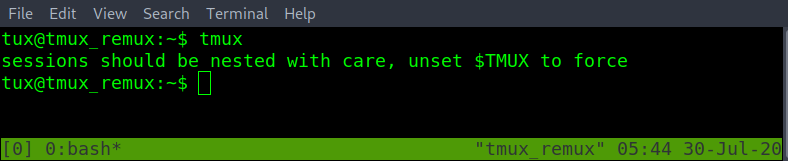
Tmux doesn't allow to create of a nested tmux within a tmux unless you force it to. When running the tmux command a second time.
To change the session name from "0" -> "box-dev". Must first learn how tmux is called. All commands within a tmux session all start with the tmux prefix is. By default, the tmux prefix is "Ctrl b".
After the tmux prefix. To the hotkeys to change the current tmux session's name is "shift $".
ctrl b shift $
Retype the new name and then enter-key to save the new session name.


If there is a need to create another tmux session within the current one. Use the -d argument with the tmux command. To spawn a new tmux session without attaching to it. In the example image below. The -s argument is used to specify the session name for the new session. Typed as "tmux new -s <new-session-name> -d".

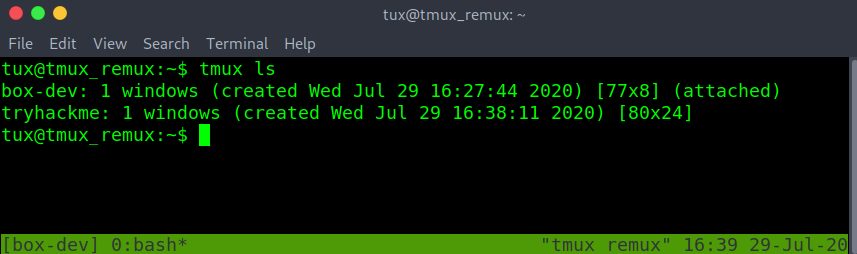
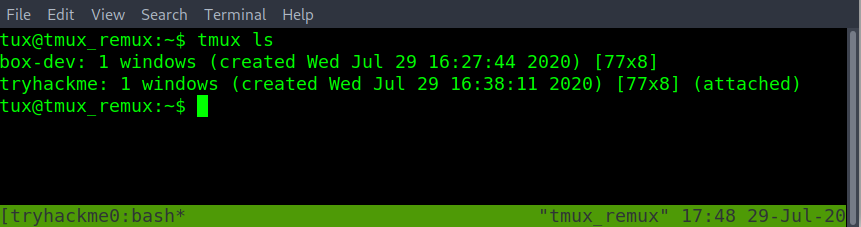
To list all active tmux sessions. Run tmux with list-sessions. Or the short version of list-sessions as ls. In the example below. Running tmux ls also shows the current session in use. Marked by "(attached)".
Exiting a tmux session without closing it can be done with the prefix. Followed by d
ctrl b d
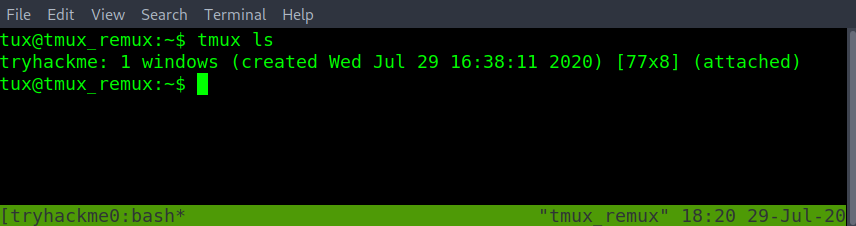
Checking again with the tmux ls command. "(attached)" is missing from both sessions. This means the sessions are active but we are detached and are unable to interact with either session.

To reattach to an active tmux session. Run tmux with the attach option and -t followed by the desired session name.

The tmux session name has changed to the attached session of "tryhackme". Double-checking with tmux ls. Can confirm that "(attached)" also on the "tryhackme" session name.
Delete a single session by its session name. Is done with the kill-session option with tmux. Followed by -t and the <target-session-name-to-delete>

Listing sessions with tmux ls. This shows that the session name of box-dev has been removed. WARNING! By deleting the session. Anything open in that session will be lost if not saved before the tmux kill-session.
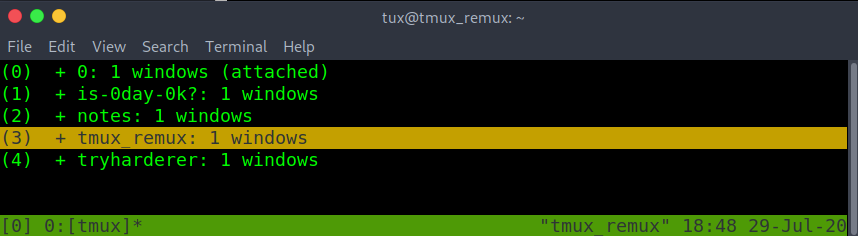
In the example below there are many sessions open. Another way to swap sessions without having to detach and reattach to another session. Is to use the prefix. Followed by the s-key to list all open sessions. Using up or down arrow keys to navigate to the desired tmux session. Then enter to select the new session.
ctrl b s
Change from session name "0" to "tmux_remux" without having to leave the current tmux session.

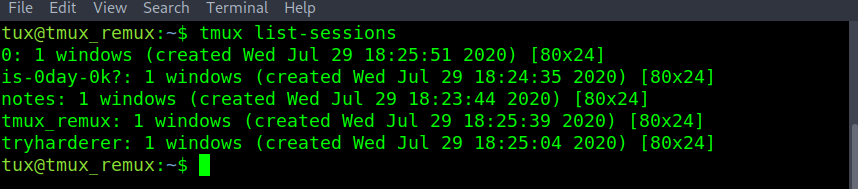
From the five active sessions above. If there was a need to kill all the sessions except for a single one. When using the tmux kill-session. Use the -a argument to close all sessions except the one specified by the -t argument. Closing all tmux sessions except for the one named "is-0day-0k?". Checked with the tmux list-sessions.

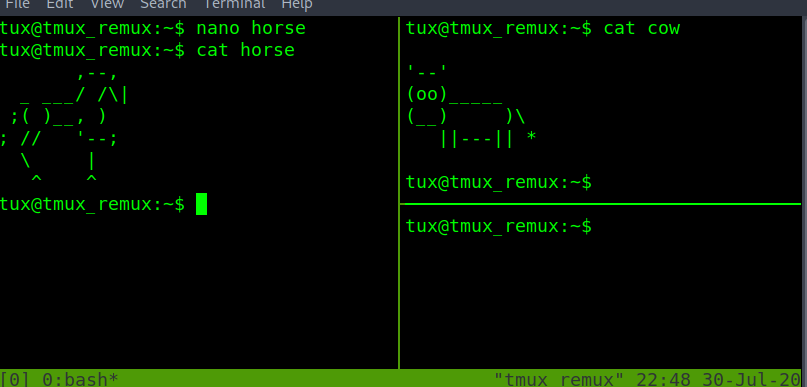
When spiting the session into different sized panes ("which will be covered in more detail in a later task"). The new pane will spawn in the directory that the tmux session was first started in.

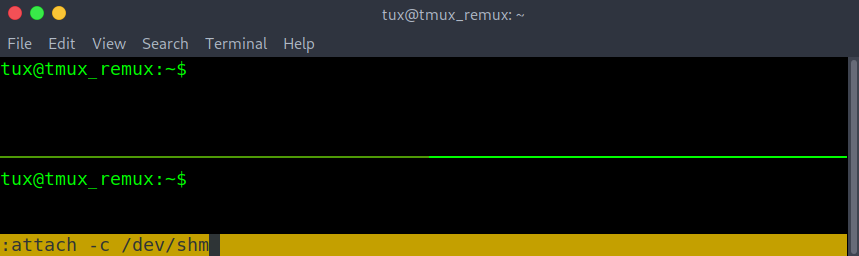
To change the base starting directory. Must first learn about tmux prompt or command mode. The tmux prompt allows tmux sessions to run tmux commands without the tmux binary name. Useful when the terminal has been filled with other text. Enter a tmux prompt with prefix shift :
ctrl b shift :
Followed by "attach -c /path/to/new/starting/directory"
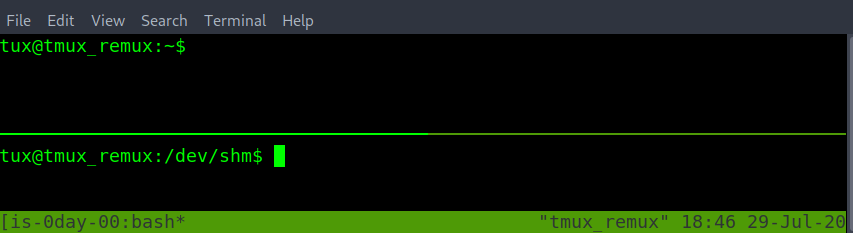
With the updated starting or base directory done above as /dev/shm. Creating a new pane start in the /dev/shm directory.
Even though at the start tmux doesn't allow nested tmux within a tmux. Attaching or starting a new tmux session on another computer by an connection. Can make a nested tmux. Not a problem. Just by changing the number of prefix used before the following command. Can determine which session gets the command.
prefix, prefix, and command. This will run on the second nested tmux session of the ubuntu machine.
prefix and command. This will run on the first tmux session. The session running on the current machine's localhost.

How to change the current tmux session name?
How to quit a tmux session without closing the session? To attach back later.
How to list all tmux sessions?
How to reattach to a detached tmux session with the session name of "thm"
How to create a new tmux session from your current tmux session with the name kali?
How to switch between two or more tmux sessions without detaching from the current tmux session?
How do you force kill the tmux session named "thm" if it's not responsive from a new terminal window or tmux session?
How to get into a tmux prompt to run/type tmux commands?
Are there more than one way to exit a tmux prompt? yea/nay
Is tmux case sensitive. Will hitting the caps lock break tmux? yea/nay
Within tmux prompt or command mode how would you change the tmux directory? Where a new window or pane will start from the changed directory of /opt.
How to kill all tmux sessions accept the one currently in use? With the name "notes".
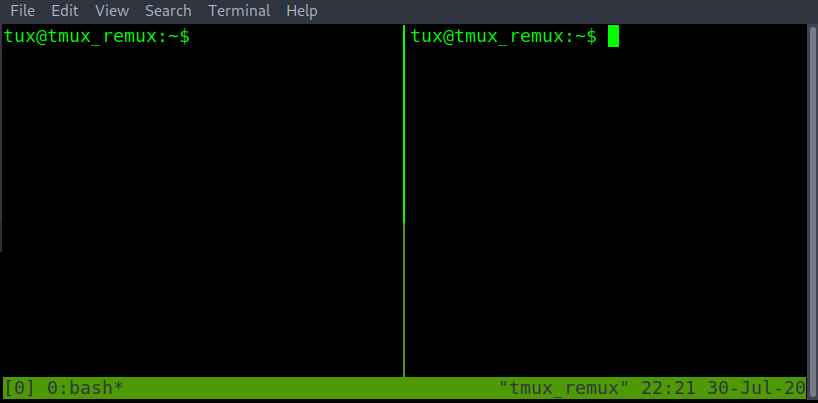
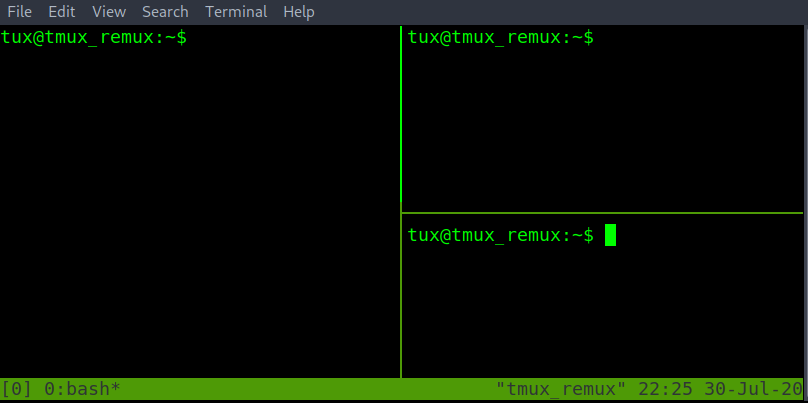
Within the current tmux session window. Tmux panes are used to divide the current session into multiple-sized terminals. That allows multiple commands to run within the same session window.
To split the currently selected pane horizontally. Do the prefix. This followed by a shift "
ctrl b shift "
To split the currently select pane vertically. Do the prefix. Followed by shift %
ctrl b shift %
 j
j
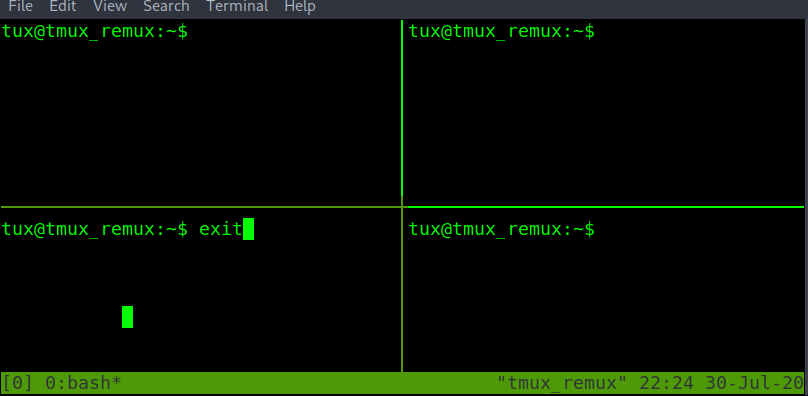
The exit command can be used to close the currently selected pane.
Moving to another pane within the same window can be done with the prefix. Followed by the arrow keys.
ctrl b <arrow key>
However, the main problem with this method is sometimes when using the arrow keys again. For example, to move the terminal cursor box could move to another tmux pane instead.
To resolve this issue can prefix followed by o instead. This can cycle through all the tmux panes. This has the added benefit of the line cursor not escaping to another pane.
ctrl b o
To swap between the most used tmux panes if more than two panes are open. "ctrl b ;" is the better option. "ctrl b o" is better when there are just two panes open.
ctrl b ;
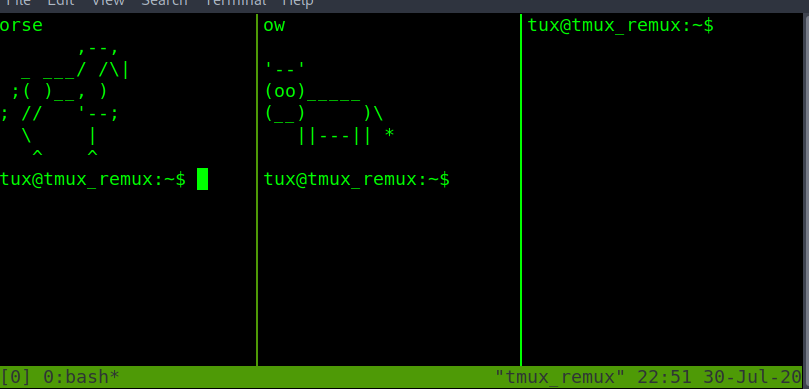
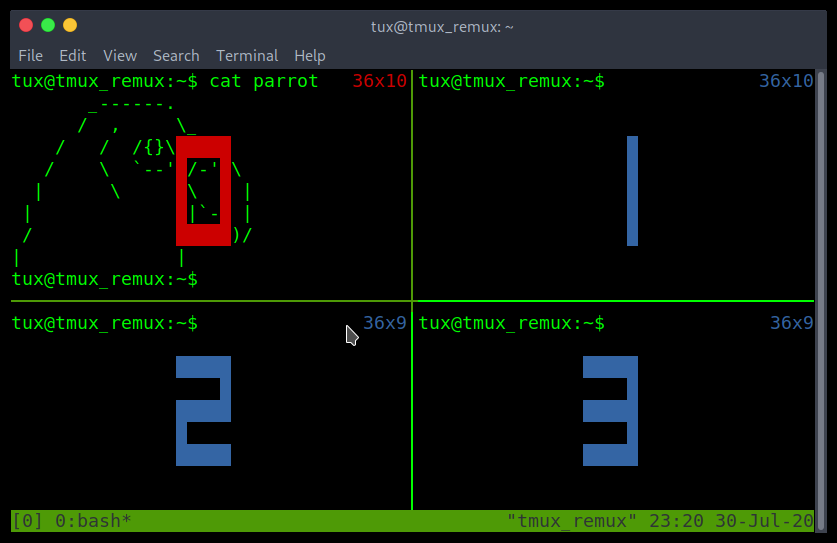
With <arrow-keys> and or <o> in the image below to move the terminal cursor box from the left to the.
If a tmux pane isn't responsive and ctrl-c isn't resolving the issue. Force close or kill the currently selected tmux pane with the prefix and x. Then y to confirm.
ctrl b x y
If killing the pane was a mistake. Use the n option for no instead of y for yes when the kill-pane prompt is shown.

Managing the placement of panes. Can change the layout without having to exit panes or open create new panes.
To move the currently selected pane. In a clockwise rotation. Do prefix shift }
ctrl b shift }

Note. All other panes will move clockwise with the currently selected pane.
To move the currently selected pane counter-clockwise. Do prefix shift {
ctrl b shift {
Another way to manage the pane location is with five built-in layouts. This can be done with the prefix followed by the escape OR esc key and the desired option from the number selected from 1 to 5.
ctrl b esc 4
Note that the layout result depends on how many panes are currently open.
To cycle through the built-in pane layouts one at a time. Do the prefix with the spacebar. This can also be an alternative using a clockwise or counter-clockwise option when there are only two panes open on the current tmux window.
ctrl b spacebar
Lastly when it comes to managing panes. There might be a need to swap the place between two panes. When cycling panes don't create the desired pane layout.
Before swapping, you can identify pane numbers with ctrl b q. You must first check the number each pane has been assigned. This also provides the size of each pane.
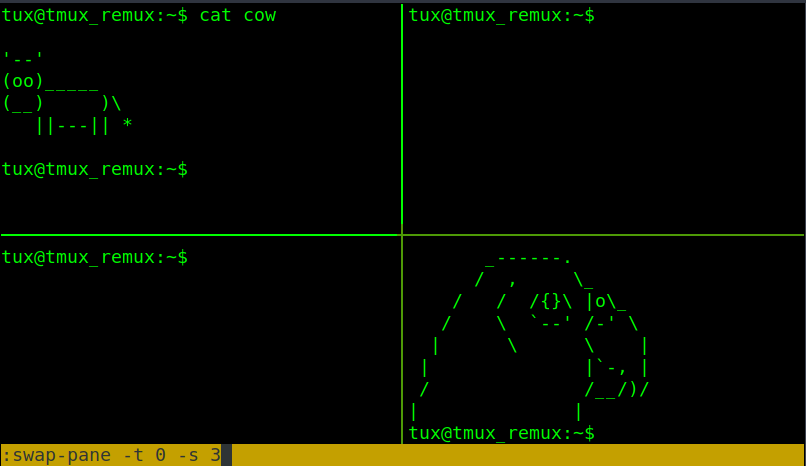
For the swap pane example. It will be done within tmux prompt or command mode with prefix shift : then the commands swap-pane. With -s <source-pane> and -t <destination-pane>. This will send the move/swap the currently selected pane and keep the currently selected pane selected after the swap.
:swap-pane -s <source pane final swap location> -t <currently selected destination pane>
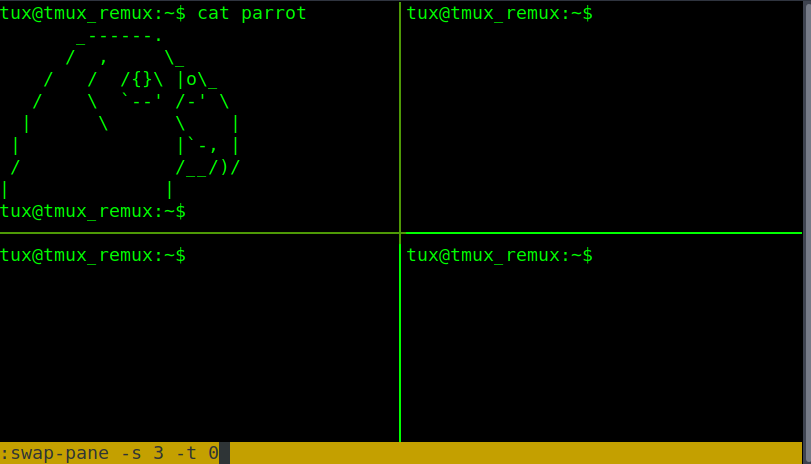
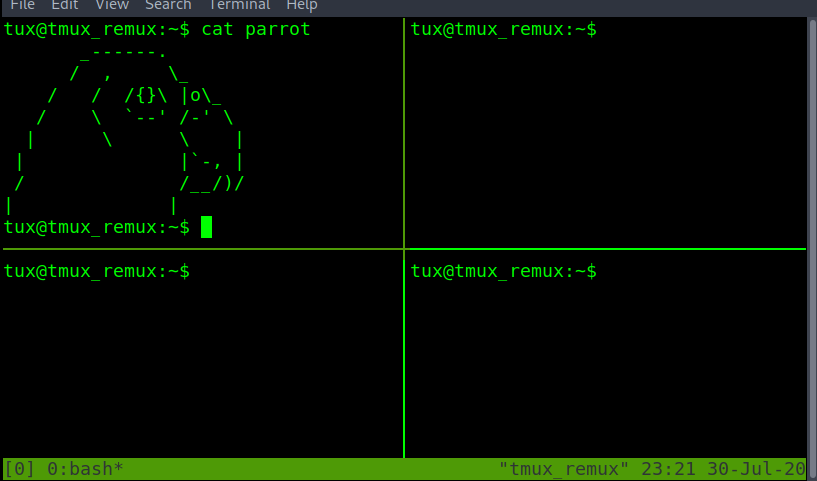
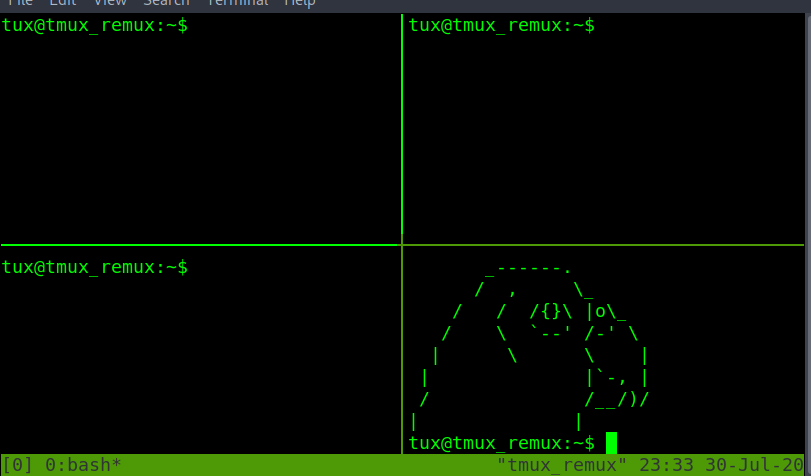
With the command above in this example. The currently selected pane of the parrot has moved to the bottom right and has followed the currently selected pane. Still able to start typing within the parrot pane without having to switch to another pane.
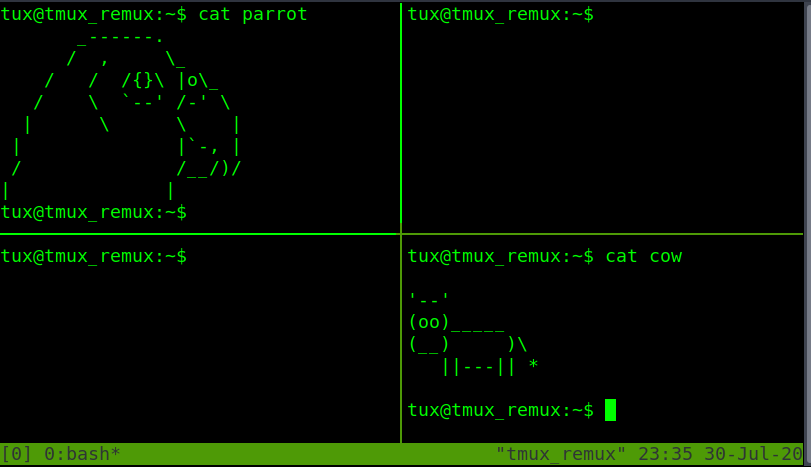
To swap places with another pane and select the other open pane. Instead of the currently selected pane. Have the -t <destination-pane> first with the pane you want to swap with. Followed by the -s <source-pane> or currently selected pane
:swap-pane -t <pane to swap with> -s <currently selected pane>
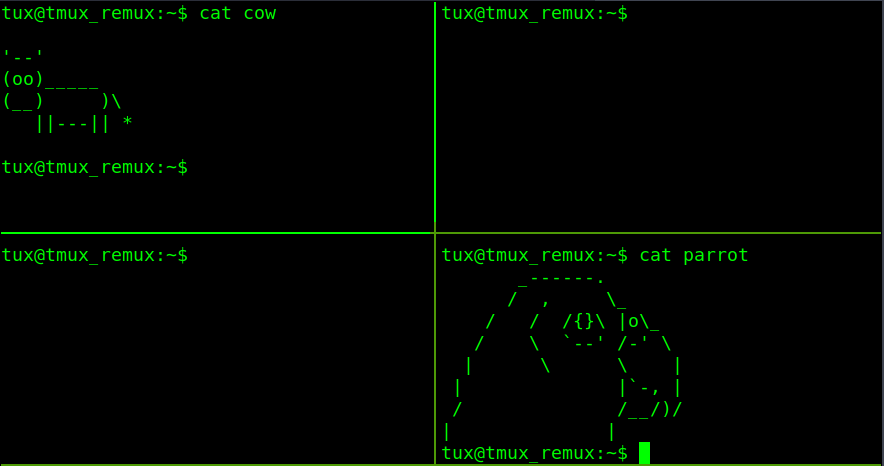
Started with the parrot in the bottom right pane. After the command. Have swapped places with the cow. Also, the new currently selected pane is the cow.
How to close a tmux pane like closing a ssh session?
How to create a new pane split vertically?
How to cycle/toggle between tmux layouts, one at a time?
How to move between the two must used tmux panes for the current tmux window?
Can you use the arrow to move to the desired pane? yea/nay
How to move the currently selected pane clockwise?
How to move the currently selected pane counter-clockwise
How to swap two panes and move with the swapped pane? Within tmux prompt mode. 1 -> 3 location
How to swap two panes without changing the currently selected pane location? Within tmux prompt mode. 1 -> 4 pane number
Tmux windows are like a new terminal tab that you can easily swap from and more. To create a new empty tmux window to work on. Do prefix c. Shown with the new window number and name. Note the currently selected window will be marked with a * or wildcard star. At the end of the current window name.te must be at least 1 minut
ctrl b c
To change the name of the current window. Do prefix ,. After retyping the new window name. Hit the enter key to save changes.
ctrl b ,


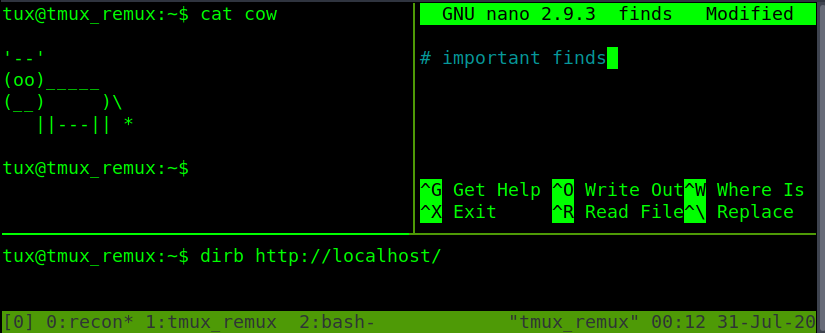
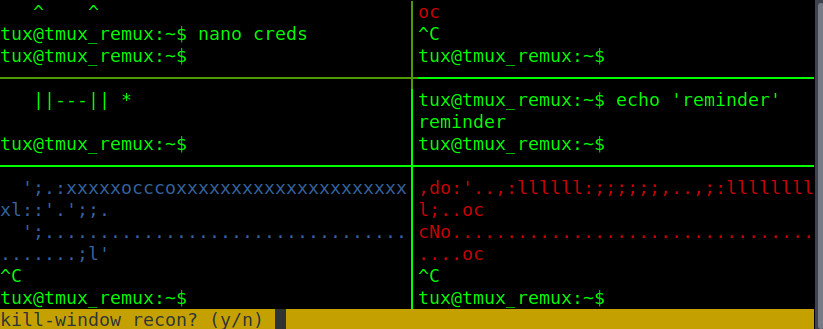
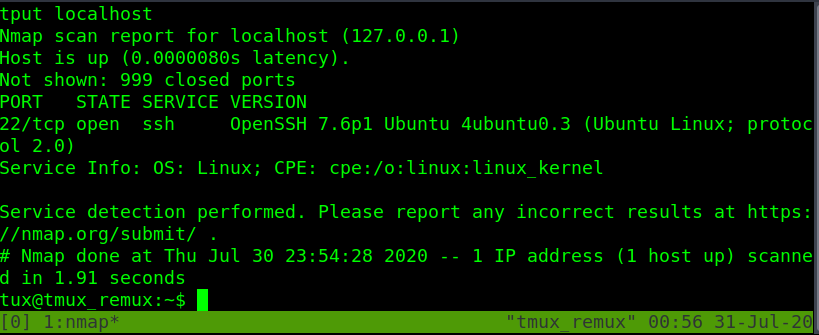
Oh NO. The recon window has been cluttered with multiple panes and can't view the output. To detach a pane into its own window. move the desired pane to move to its own window. Then prefix shift !.
ctrl b shift !
The has been sent to a new window named "bash". Now able to view the whole scan without run the scan again.
To cycle between windows can be done with prefix n for the next window. Or prefix p for the previous windows.
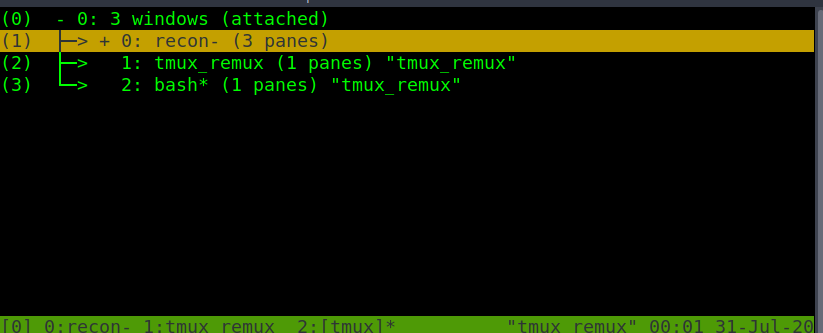
Another method to switch to the desired window is to use prefix w. This will list all the tmux windows. Using the arrow keys to select the desired windows and enter-key to select the highlighted window.
Moving back to the recon window. Shows the pane is has been moved and there is more room to work.
If a tmux window has been borked and needs to be terminated quickly. Killing the window will also close any panes open within the currently selected tmux window. To kill or close a tmux window do prefix shift & and followed by y to close the window. Or n to keep it open.
ctrl b shift &
Prompt after the command.
Closing the recon window. The name recon is removed from the status bar below.
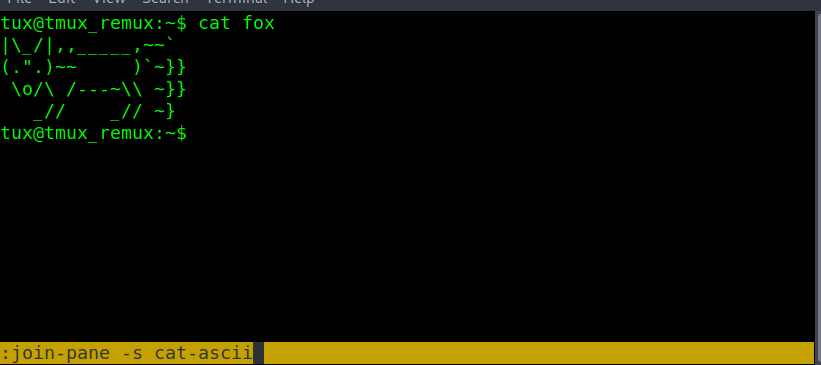
Previously in this task was shown how to break off a pane into its own window. However, sometimes the is a need to fuse two windows together as a single window.
To join two different windows/panes back into one. Can be done with the window name or number. The command is run within tmux prompt or command mode. Prefix shift : then within the prompt :join-pane -t <window-name> OR :join-pane -s <window-name>. Where -s is the source name and -t is the destination window name.
First. Enter tmux prompt or command mode from the tmux session.
ctrl b shift :
Second. Type join-pane with the desired option and window name.
join-pane -s <source-window-name>
join-pane -t <destination-window-name>
Third. Hit Enter to run the join-pane command.
For the join-pane commands adding -v on the end fuses the two panes together horizontally. Adding -h on the end of the join-pane command fuses two panes together vertically.


How to move the currently selected pane to it's own tmux window?
How to fuse two panes together with the "source" window of "bash"? After entering a tmux prompt?
What option can added with question 4 and 5 to fuse together horizontally?
With join-pane can you use the window number instead of the window's name? yea/nay
How to kill or completely close a window. Including all the panes open on that window. If it's unresponsive?
How to view and cycle between all the tmux windows for the current tmux session without detaching from the current session?
How to move back to the previous tmux window?
How to move up to the next tmux window?
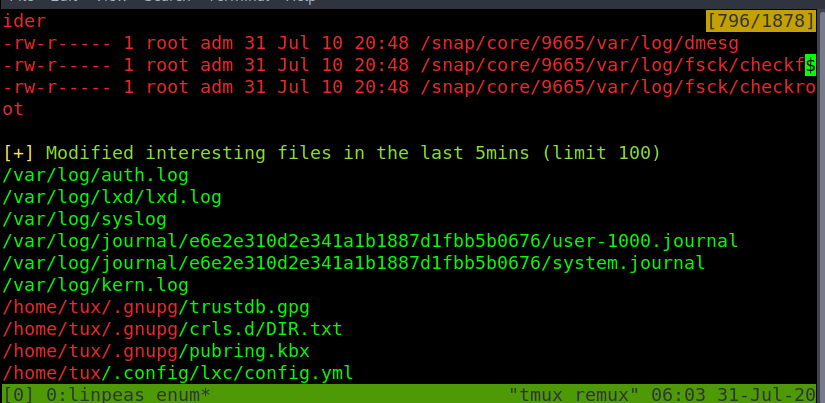
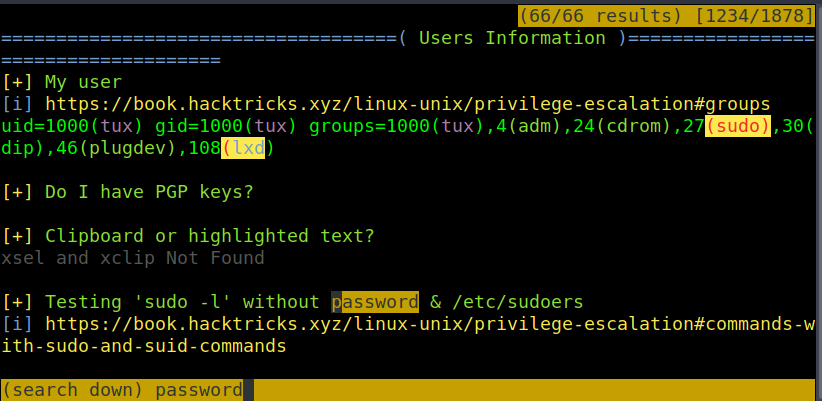
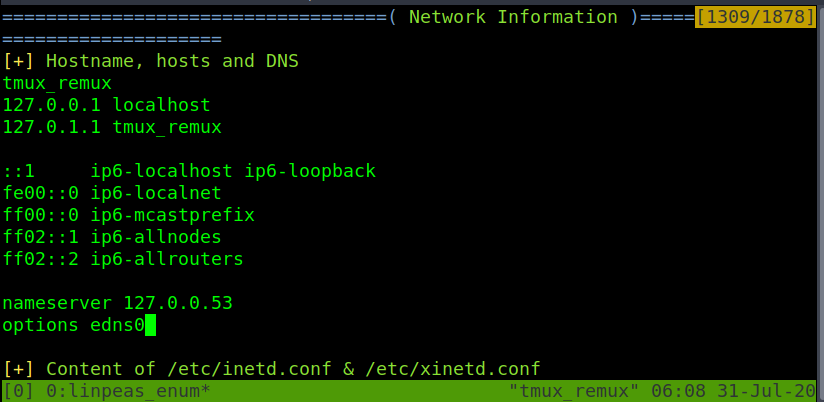
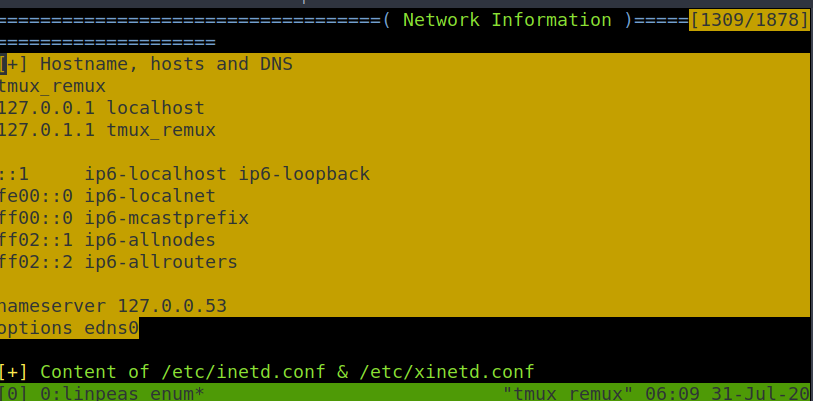
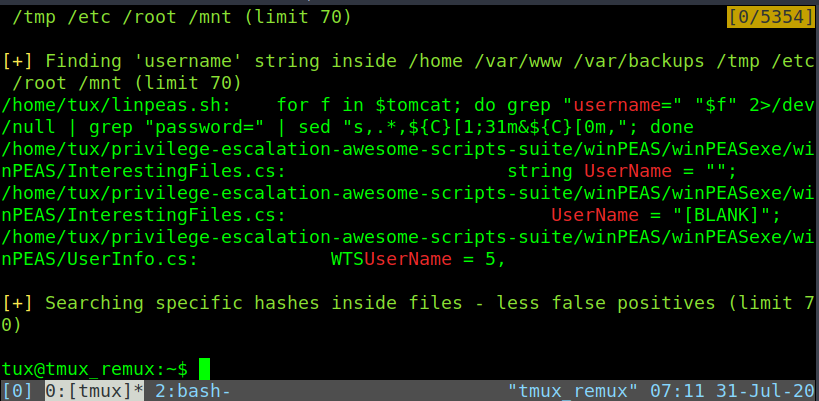
Copy mode can be used to scroll up and down the page. If the text is larger than the length of the pane or window size. To start copy mode. Type ctrl b [ and a number will show up in the top right corner of the current pane or window using copy mode. After scrolling. Exit copy mode with the q key.
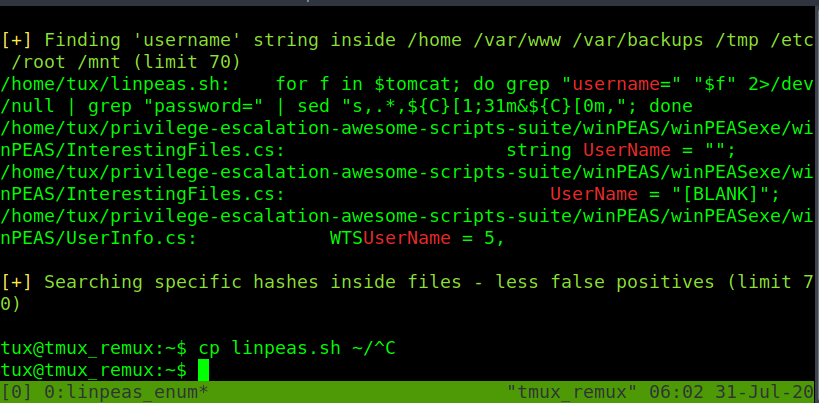
Allows scrolling through linpeas output.
When manually searching for the block of text to copy. It can be easy to miss. This can be quickly solved by searching up or down the page.
To search up the page. Within copy mode. Type ctrl r and the search term or string to search for. To continue searching the same string. Hold down ctrl and press r again to jump to the next string location. Resume scrolling by hitting the enter key. Will stop at the search string/term.
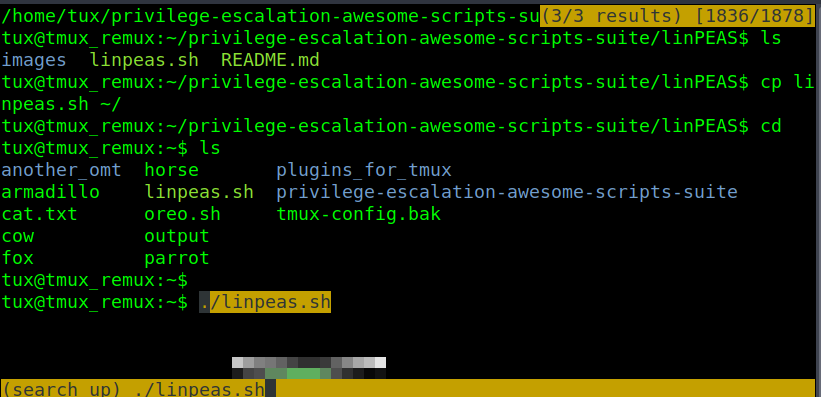
To search down the page. Is the same basic idea as search up. However, this is done with s instead of r as ctrl s and then the search term or string. While holding down ctrl retype s to jump to the next string location. Again resume scrolling by hitting the enter key. Will stop at the search string/term.
To copy and paste within tmux copy-mode takes 4 steps. Note that this method will only apply to the tmux clipboard as follows.
0) ctrl b [ # enter copy mode
1) scroll to the start of the block of text you would like to copy
2) enable highlighting with ctrl spacebar. Then use the arrow keys to up to select all the text. Down if you start from the top instead.
3) copy all the highlighted text to the tmux clipboard with alt w. Note! Even though the highlight will disappear. The text still copied to the tmux clipboard.
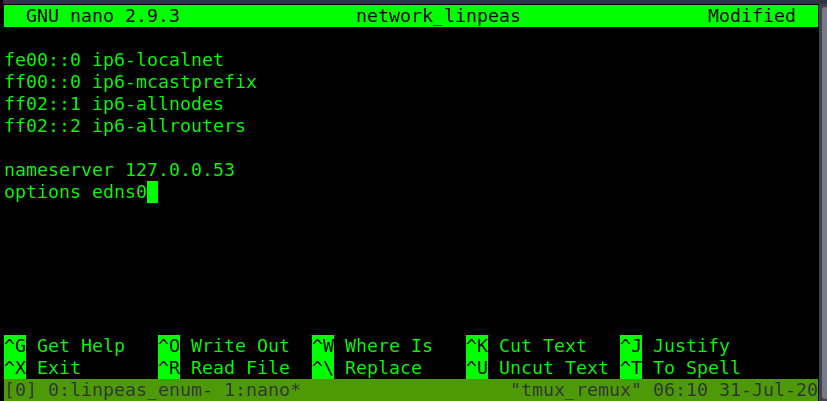
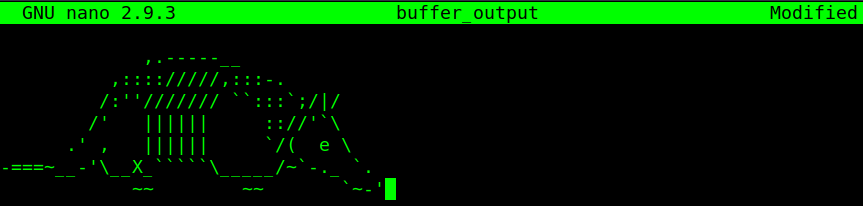
4) create a new file to paste the final text with ctrl b ].
To double-check what the text that is currently copied to the tmux clipboard. Do prefix followed by shift #
ctrl b shift #
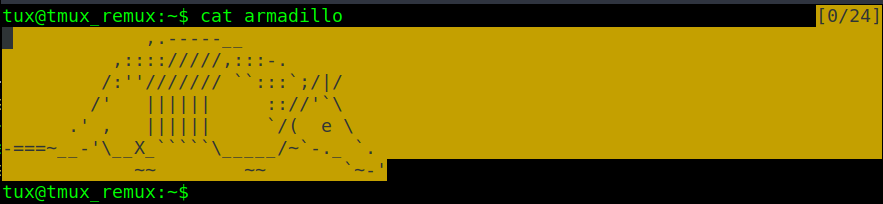
Note. Even though the text might look broken don't worry it will paste as it was copied within a terminal file editor. To quit back to the terminal. Hit the q key once.

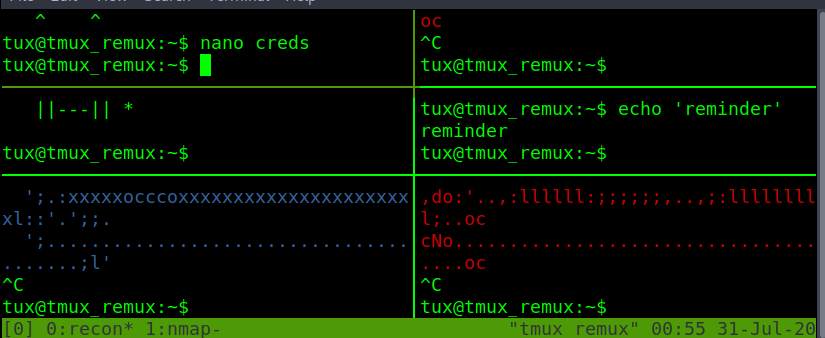
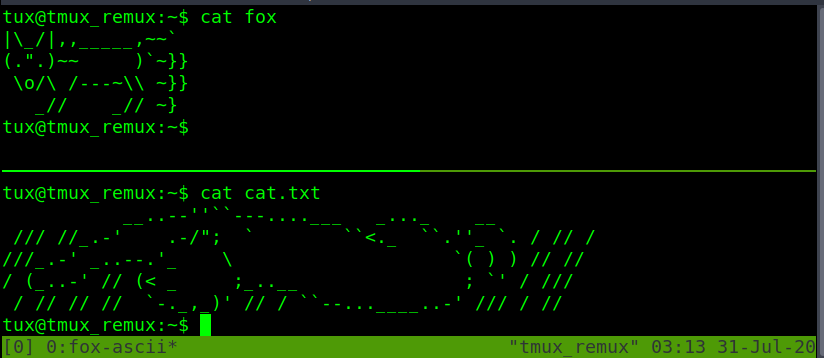
Pasting again with prefix ] shows that it pasted corrected from the origin ASCII image.
ctrl b ]
While in copy mode. How to search/grep up the wall of terminal text?
While in copy mode. How to search/grep down the wall of terminal text?
How to exit search up or search down within copy mode?
After starting copy mode. How do you enable text highlighting to select for text copying?
When in a terminal text editor. How to paste from the tmux clipboard?
The last four tasks have covered commands of how to use tmux with its defaults. Tmux by default doesn't have a default configuration file. That doesn't mean you can make one.
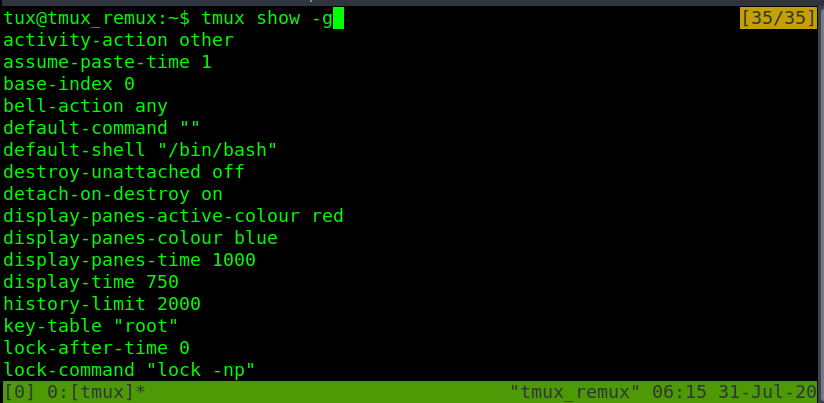
Before crafting a custom configuration file for tmux. It might be a good idea to show all the options of the defaults. With tmux show -g argument for global.
When creating the tmux configuration script it is important that. The file name is .tmux.conf and .tmux.conf is saved within the user's home directory /home/username/.tmux.conf
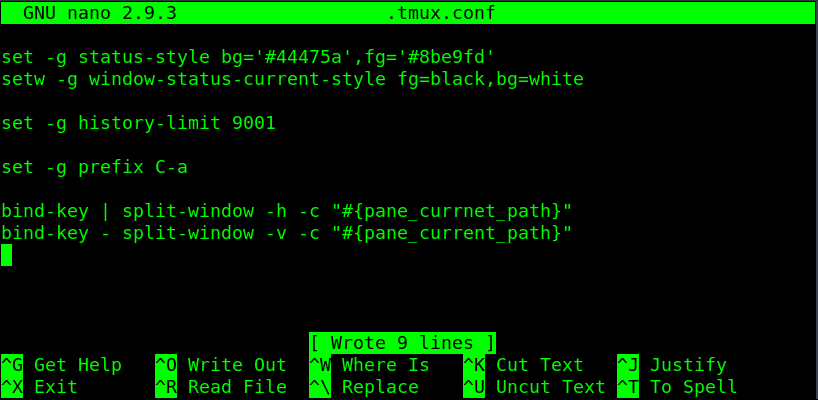
set -g status-style bg='#44475a',fg='#8be9fd'
This line is to modify the color of the status bar.
setw -g window-status-current-style fg=black,bg=white
This line adds highlight in the color of white for the currently selected window.
set -g prefix C-a
Allow changing the prefix from ctrl b to ctrl a. If there is any need to use the alt key instead of ctrl. Then set prefix as M-b or another second character, such as M-a. Changing the prefix from ctrl b to alt a.
The set history limit allows copying mode to have a higher max character limit. Useful for copying output that goes beyond the default tmux history limit.
 '
'
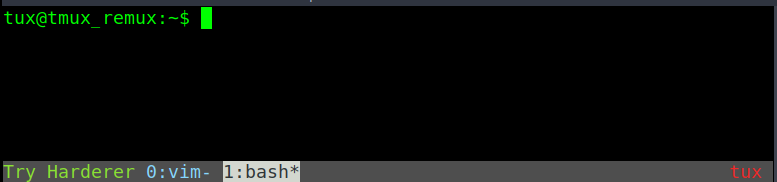
The left side of the status bar can be customized with status-left within set or set-option. In the example below the first one status-left-length 15. Set the total amount of characters that can be shown on the left. The following line displays 'Try Harderer' with the echo command.
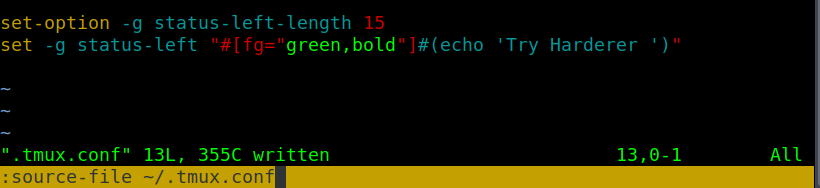
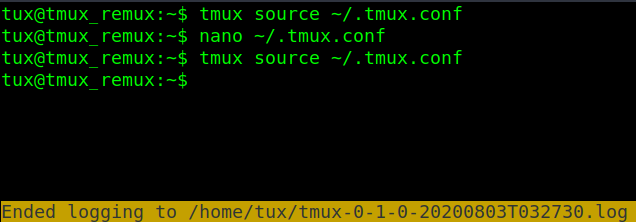
After reloading the tmux configuration file within the session ctrl b shift : followed by source-file /home/username/.tmux.conf OR source-file ~/.tmux.conf
# NOTE the .tmux.conf can also be reloaded by closing and restarting a new session. Or with the tmux command as
tmux source /home/username/.tmux.conf

When adding the output of commands to the status bar. Sometimes commands will not function correctly. To resolve the issue. Put the desired one-liner or script into a file. Then make it executable with chmod or it won't work.
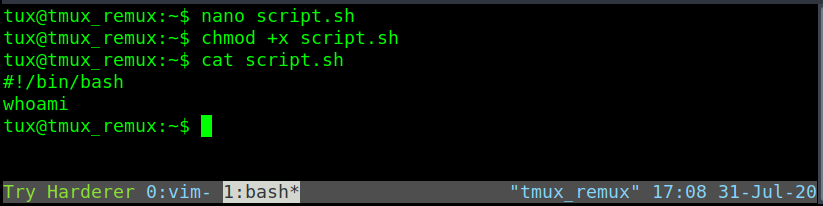
Instead of running a command. The following includes the path to the script.

Reloading the .tmux.conf file again shows the output of whowami from the script.sh

In addition to calling script though .tmux.conf is calling custom plugins. The plugins are shown were sourced from GitHub.
https://github.com/tmux-plugins/tmux-resurrect. (opens in new tab) (opens in new tab) # save sessions to resume after a system reboot.
https://github.com/tmux-plugins/tmux-logging. (opens in new tab) # plugin for creating command history to review later.
https://github.com/tmux-plugins/tmux-yank. (opens in new tab) (opens in new tab) # plugin copy text from outside the tmux clipboard to use with other programs.

Another .tmux.conf reload. To start command history logging for the currently selected pane do prefix shift p. This will start a log file within the current user's home directory.
ctrl b shift P
Although there a problem. When reloading the .tmux.conf file. The whoami script.sh from before prints a duplicate string.

This is because the first set status-right had used the -a or append argument. Append give to option without having to redo everything. However when reloading the tmux configuration .tmux.conf file. It prints duplicates. This can be resolved by only using the -g or global argument.

Reloading the .tmux.conf file. Can see that only using the global argument -g alone removes the hostname, time, and date from the status-right. Whoops.
Resolving the issue will be done by value in the same order as was with -ga.
#H is the place holder for the hostname.
%H:%M is the hour and minutes of the clock.
%d-%b-%y will follow last for the day, month, and year.

A .tmux.conf reload later and everything is back to normal. Any attempt to reload the .tmux.conf file doesn't print duplicate status-right from the script.sh file.

Not a fan of copy modes hotkeys. Well by default they are set to emacs.

To changes, this adds the set -g mode-keys vi. Save the .tmux.conf script and reload. To copy with this setting.
1) ctrl b [ # enter copy mode
3) # arrow key to the start or end of what you would like to copy
2) spacebar # followed by the arrow keys to highlight all the text
3) enter # copy the highlighted text to the tmux clipboard
4) ctrl b ] # paste the tmux clipboard

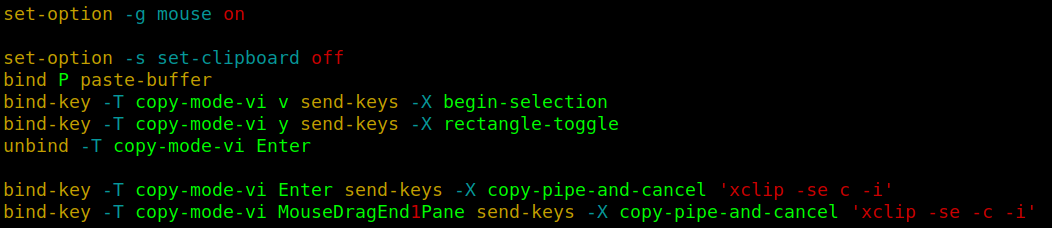
To make copy mode feel more like as if copying blocks of text in vi file editor. The code between mouse on and the last two lines.
This allows has mouse mode on. That allows us the use of the mouse to resize tmux panes or scroll without needing to use the hotkeys to enter copy mode.
The last two lines below allow anything though vi y key to be also saved secondary keyboard. The secondary keyboard is the ctrl c ctrl v. This means that the copy text will be pasted from the ctrl v buffer. Instead of the copied text being trapped within tmux.
The alternative to building a custom .tmux.conf configuration script it utilize a open-source .tmux.conf script. That can be easily found by searching online with Oh My Tmux. For this example will use the tmuxconfig repository from github. that can be found at the link below.
https://github.com/chaosma/tmuxconfig. (opens in new tab) (opens in new tab)
First. Change the .tmux.conf to something new. For example, changing the name from .tmux.conf to custom-tmux.bak

Second. Install the tmuxconfig repository with clone and copy the hidden .tmux.conf file to the home directory of /home/username/
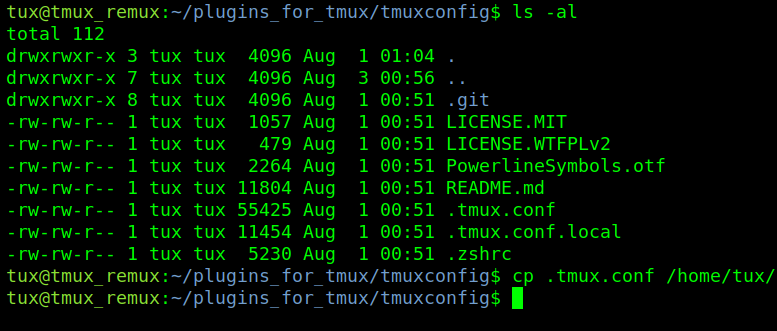
Third run a new tmux session or reload the tmux configuration .tmux.conf file to see changes
To change scripts back replace the .tmux.conf file again in the home directory or call the desired .tmux.conf file when starting a new tmux session with the -f argument for configuration file
tmux -f /home/username/custom-tmux.bak
# NOTE. That using the tmuxconfig or other tmux.conf configuration files is the only one that loads in. Regardless if the .tmux.conf had been deleted or replaced with another .tmux.conf file. Tmux can be reset back to its default configuration by killing the tmux server. with kill-server
# IMPORTANT WARNING. Before running the kill-server command backup and save everything. On every session, window, and pane because this command will stop everything.
tmux kill-server
Can you use Hex color codes in place of the color name? yea/nay
How would you change the prefix to Ctrl a?
How would you load a plugin into a tmux config file?
How can you run the desired plugin after loading it?
Hope you enjoyed my first room. This script was created while testing the Tmux Remux room. Where the network interfaces will be checked for the OpenVPN network interface name of "tun0". If "tun0" is up. The user's TryHackMe localhost address will be shown at the bottom right of their tmux. If "tun0" is down. An error message will be shown "OpenVPN Not Active". In the bottom right of their tmux.
Example screenshot of the tmux script printing the error since . isn't running.

Example screenshot of the tmux script printing the current . user's IP address.

NOTE! Using these not on or with a different network interface that isn't tun0 will print the error messages.
Here is a quick example script of installing my custom .tmux.conf script.
#!/bin/bash
# also comes with the repo as oreo-setup-script.sh
~/
clone https://github.com/OreoByte/another_omt.
chmod +x ~/another_omt/thm_vpn
chmod +x ~/another_omt/curl_thm_vpn
cp ~/another_omt/simple_tmux.conf ~/.tmux.conf
# Great thanks to 0day, alanfoster, and briskets for helping me with this room.
Ready to learn Cyber Security?
TryHackMe provides free online cyber security training to secure jobs & upskill through a fun, interactive learning environment.
Already have an account? Log in