
Network Discovery - Scan-ta Clause
Discover how to scan network ports and uncover what is hidden behind them.
easy

To access material, start machines and answer questions login.
The Story

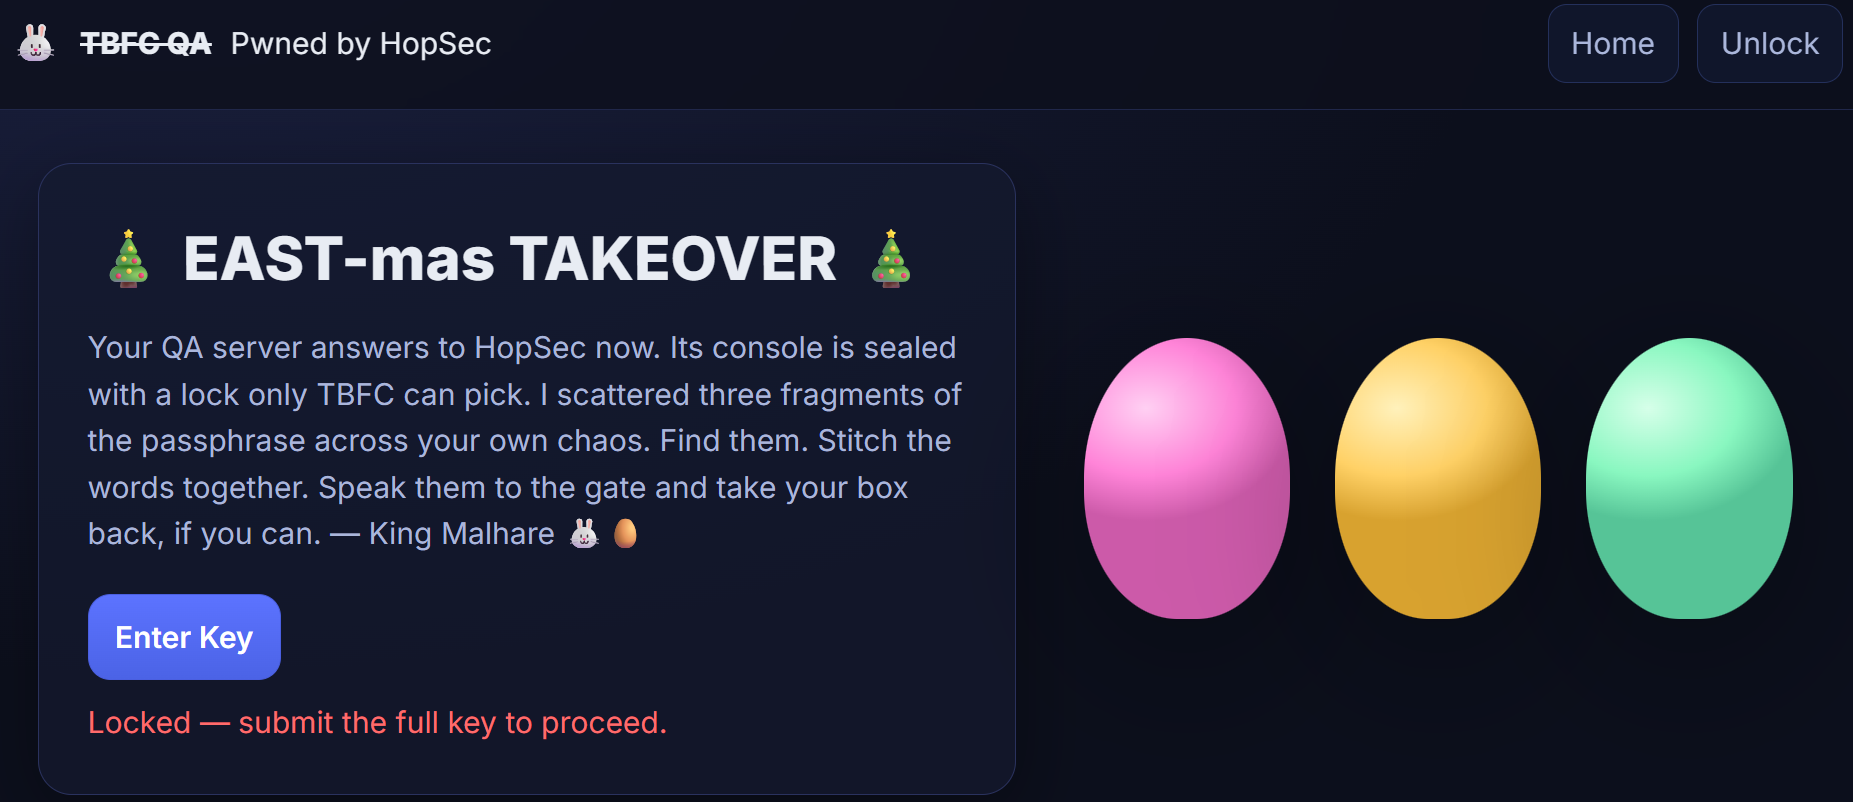
Christmas preparations are delayed - HopSec has breached our QA environment and locked us out! Without it, the TBFC projects can't be tested, and our entire -mas pipeline is frozen. To make things worse, the server is slowly transforming into a twisted EAST-mas node.
Can you uncover HopSec's trail, find a way back into tbfc-devqa01, and restore the server before the bunny's takeover is complete? For this task, you'll need to check every place to hide, every opened port that bunnies left unprotected. Good luck!

Learning Objectives
- Learn the basics of network service discovery with
- Learn core network protocols and concepts along the way
- Apply your knowledge to find a way back into the server
Connecting to the Machine
Before moving forward, review the questions in the connection card shown below:
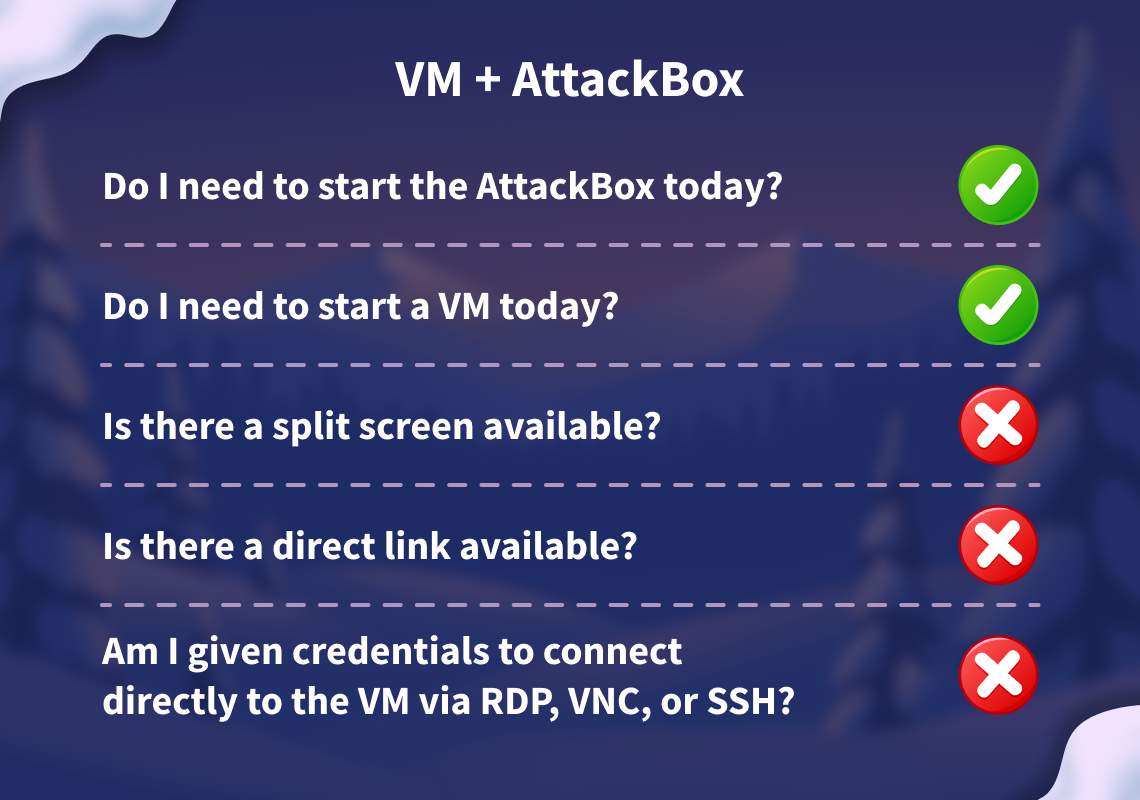
Start your lab machine by clicking the Start Lab Machine button below. The machine will need about 2 minutes to fully boot. Additionally, start your AttackBox by clicking the Start AttackBox button below. The AttackBox will start in split view. In case you can not see it, click the Show Split View button at the top of the page.
Set up your virtual environment

I have successfully launched the lab machine and the AttackBox.
Discovering Exposed Services
Although we lost access to the QA server, at least it's still active, and we know its IP address. That's good news, since now we can counterattack and hopefully find our way back. Ensure you understand basic Networking Concepts like network ports, and let's plan the engagement!
- Know your target. In our case, it is the
tbfc-devqa01server with theMACHINE_IPIP address. - Scan the IP for open ports, especially common ones like 22 for SSH and 80 for HTTP.
- Explore what's behind the open ports, maybe it's a vulnerable web server running on port 80.
- Exploit the exposed service, find a way in, and kick out the bad bunnies from the QA server.
Along the practical of today's task you will find three keys.
Keep note of them since you will later need them for the web app.
The format will be KEYNAME:KEY.
The Simplest Port Scan
There are many tools you can use to scan for open ports, from preinstalled Netcat on Linux and PowerShell on Windows, to specialized, powerful tools like Nmap and Naabu. Let's use Nmap for this task and perform a basic scan from the AttackBox or your own VPN-connected attacking machine. Open a new command line terminal and run the following command:
           root@attackbox:~# nmap MACHINE_IP
Nmap scan report for MACHINE_IP
Host is up (0.061s latency).
PORT     STATE SERVICE
22/tcp   open  ssh
80/tcp   open  http
The command scanned the top 1000 most commonly used ports and reported if any services were running there. The only results you received are an opened port for remote machine access and a port for a website. This means you can now access the server via (if you know the password), or open the website by visiting http://MACHINE_IP from within the AttackBox:
Scanning Whole Range
It seems like the website is defaced by bad bunnies, and we don't know the key to enter the admin panel! But worry not. We scanned just 1000 ports, but there are actually 65535 ports where other services can hide! Now let's add the -p- argument to scan all ports, and --script=banner to see what's likely behind the port:
           root@attackbox:~# nmap -p- --script=banner MACHINE_IP
Nmap scan report for MACHINE_IP
Host is up (0.00036s latency).
Not shown: 65531 filtered ports
PORT      STATE SERVICE
22/tcp    open  ssh
|_banner: SSH-2.0-OpenSSH_9.6p1 Ubuntu-3ubuntu13.14
80/tcp    open  http
21212/tcp open  trinket-agent
|_banner: 220 (vsFTPd 3.0.5)
25251/tcp open  unknown
|_banner: TBFC maintd v0.2\x0AType HELP for commands.
Looks like you found a running FTP server and some custom TBFC application. Even though FTP runs on port 21 by default, it's possible to change the port to any other one, such as 21212. Let's try accessing the FTP in anonymous mode with the ftp command and see if we can find our way in! You can follow the commands from the terminal below:
           root@attackbox:~# ftp MACHINE_IP 21212
Connected to 10.10.239.62.
Name (10.10.239.62:root): anonymous
ftp> ls
-rw-r--r--  1  ftp  ftp  13 Oct 22 16:27 tbfc_qa_key1
ftp> get tbfc_qa_key1 -
[GET HIDDEN KEY 1 FROM HERE]
ftp> ! # Will exit the FTP shell
Port Scan Modes
Good job finding the first flag part. There is nothing more we can see on the server, so let's move on to the custom TBFC app on port 25251. Since it is not a well-known service like HTTP or , your web browser or client won't know how to access it. Luckily, you can always use Netcat (nc), a universal tool to interact with network services:
           root@attackbox:~# nc -v MACHINE_IP 25251
Connection to 10.10.239.62 25251 port [tcp/*] succeeded!
TBFC maintd v0.2
Type HELP for commands.
HELP                                   # Your input/request
Commands: HELP, STATUS, GET KEY, QUIT  # Server response
[RUN THE CORRECT COMMAND TO GET HIDDEN KEY 2]
Once you received the key, press CTRL+C to exit the Netcat client.
TCP and UDP Ports
Congratulations on the second flag! But where to look for the third one? Till now, you have scanned only TCP ports, but there are also 65535 ports for UDP, another transport protocol. And there is a chance HopSec secrets are hiding there, too! You can switch to UDP scan by specifying the -sU flag:
           root@attackbox:~# nmap -sU MACHINE_IP
PORT   STATE SERVICE
53/udp open  domain
[...]
After a minute you should see an open port 53 associated with DNS - a protocol that drives the modern web by connecting domains to IPs, and many more! DNS is a complex topic and many secrets can hide there, but let's just ask the DNS server if it knows the key by using dig - a command to perform advanced queries:
           root@attackbox:~# dig @MACHINE_IP TXT key3.tbfc.local +short
[RUN THE CORRECT COMMAND TO GET HIDDEN KEY 3]
On-Host Service Discovery
Now that you know all three keys to the tbfc-devqa01 QA server, it's time to call your TBFC teammates and kick out the bad bunnies. But first, log in to the server's admin panel by visiting http://MACHINE_IP from within the AttackBox and access the secret admin console by submitting the combined keys:
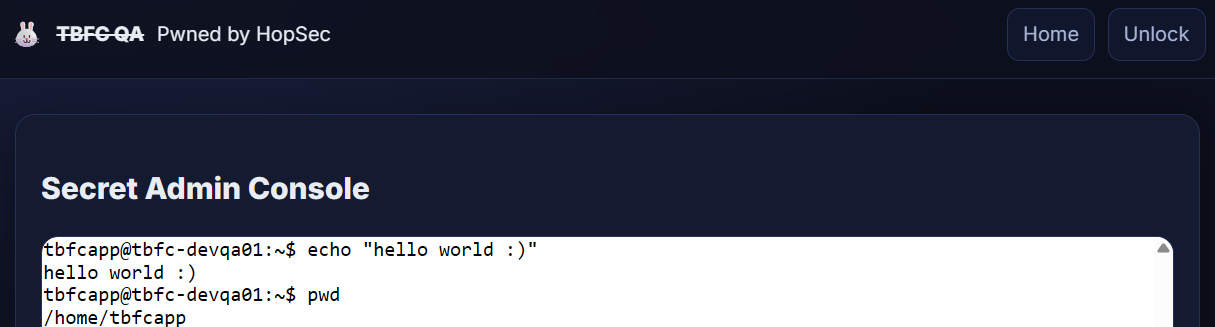
Listing Listening Ports
Once you have access to the console, there is no need to scan the ports, as you can simply ask the OS to list its open ports, also called listening ports. You can do it by running ss -tunlp (or netstat on older systems) inside the Secret Admin Console of the web app. In the output, you may see exactly the same services you scanned before listening on 0.0.0.0, but also some listening on 127.0.0.1 (available only from the host itself):
           tbfcapp@tbfc-devqa01:~$ ss -tunlp
Netid  State   Recv-Q  Send-Q       Local Address:Port      Peer Address:Port  Process
udp    UNCONN  0       0                  0.0.0.0:53             0.0.0.0:*
udp    UNCONN  0       0        10.10.76.132%ens5:68             0.0.0.0:*
tcp    LISTEN  0       50                 0.0.0.0:25251          0.0.0.0:*
tcp    LISTEN  0       32                 0.0.0.0:21212          0.0.0.0:*
tcp    LISTEN  0       4096               0.0.0.0:22             0.0.0.0:*
tcp    LISTEN  0       32                 0.0.0.0:53             0.0.0.0:*
tcp    LISTEN  0       511                0.0.0.0:80             0.0.0.0:*
tcp    LISTEN  0       2048             127.0.0.1:8000           0.0.0.0:*
tcp    LISTEN  0       151              127.0.0.1:3306           0.0.0.0:*
tcp    LISTEN  0       4096             127.0.0.1:7681           0.0.0.0:*
tcp    LISTEN  0       4096                  [::]:22                [::]:*
With root permissions, you can also view the process column. However, for now, let's focus on the 3306 port, which is the default MySQL database port. Usually databases require a password for remote clients, but allow unauthenticated logins from localhost. Since you are already inside the host, let's see the database content by using the mysql program:
           tbfcapp@tbfc-devqa01:~$ mysql -D tbfcqa01 -e "show tables;"
+--------------------+
| Tables_in_tbfcqa01 |
+--------------------+
| flags              |
+--------------------+
tbfcapp@tbfc-devqa01:~$ mysql -D tbfcqa01 -e "select * from flags;"
[GET YOUR FLAG HERE]
Great job on finding the flag! You have exposed all bunnies' secrets and regained full access to the QA server. Now it's time to secure all ports and restore the -mas preparation pipeline. But for now, answer the questions below and finish the task!
What evil message do you see on top of the website?
What is the first key part found on the FTP server?
What is the second key part found in the TBFC app?
What is the third key part found in the DNS records?
Which port was the MySQL database running on?
Finally, what's the flag you found in the database?
If you enjoyed today's room, feel free to check out the Nmap: The Basics room.
Ready to learn Cyber Security?
TryHackMe provides free online cyber security training to secure jobs & upskill through a fun, interactive learning environment.
Already have an account? Log in