
Windows Fundamentals 2
In part 2 of the Windows Fundamentals module, discover more about System Configuration, UAC Settings, Resource Monitoring, the Windows Registry and more..
info

To access material, start machines and answer questions login.
Set up your virtual environment

We will continue our journey exploring the Windows operating system.
In Windows Fundamentals 1, we covered the desktop, the , user account control, the control panel, settings, and the task manager.
This module will attempt to provide an overview of some other utilities available within the Windows operating system and different methods to access these utilities.
Press the Start Lab Machine button below to launch the attached lab machine.
If you wish to access the lab machine via Remote Desktop, use the credentials below.
Machine IP: MACHINE_IP
User: administrator
Password: letmein123!

Accept the Certificate when prompted, and you should be logged into the remote system now.
Note: The lab machine may take up to 3 minutes to load.
System Configuration
The System Configuration utility (MSConfig) is for advanced troubleshooting, and its main purpose is to help diagnose startup issues.
Reference the following document here (opens in new tab)for more information on the System Configuration utility.
There are several methods to launch System Configuration. One method is from the Start Menu.

Note: You need local administrator rights to open this utility.
The utility has five tabs across the top. Below are the names for each tab. We will briefly cover each tab in this task.
- General
- Boot
- Services
- Startup
- Tools

In the General tab, we can select what devices and services for Windows to load upon boot. The options are: Normal, Diagnostic, or Selective.
In the Boot tab, we can define various boot options for the Operating System.

The Services tab lists all services configured for the system regardless of their state (running or stopped). A service is a special type of application that runs in the background.

In the Startup tab, you won't see anything interesting in the attached VM. Below is a screenshot of the Startup tab for MSConfig from my local machine.

As you can see, Microsoft advises using Task Manager (taskmgr) to manage (enable/disable) startup items. The System Configuration utility is NOT a startup management program.
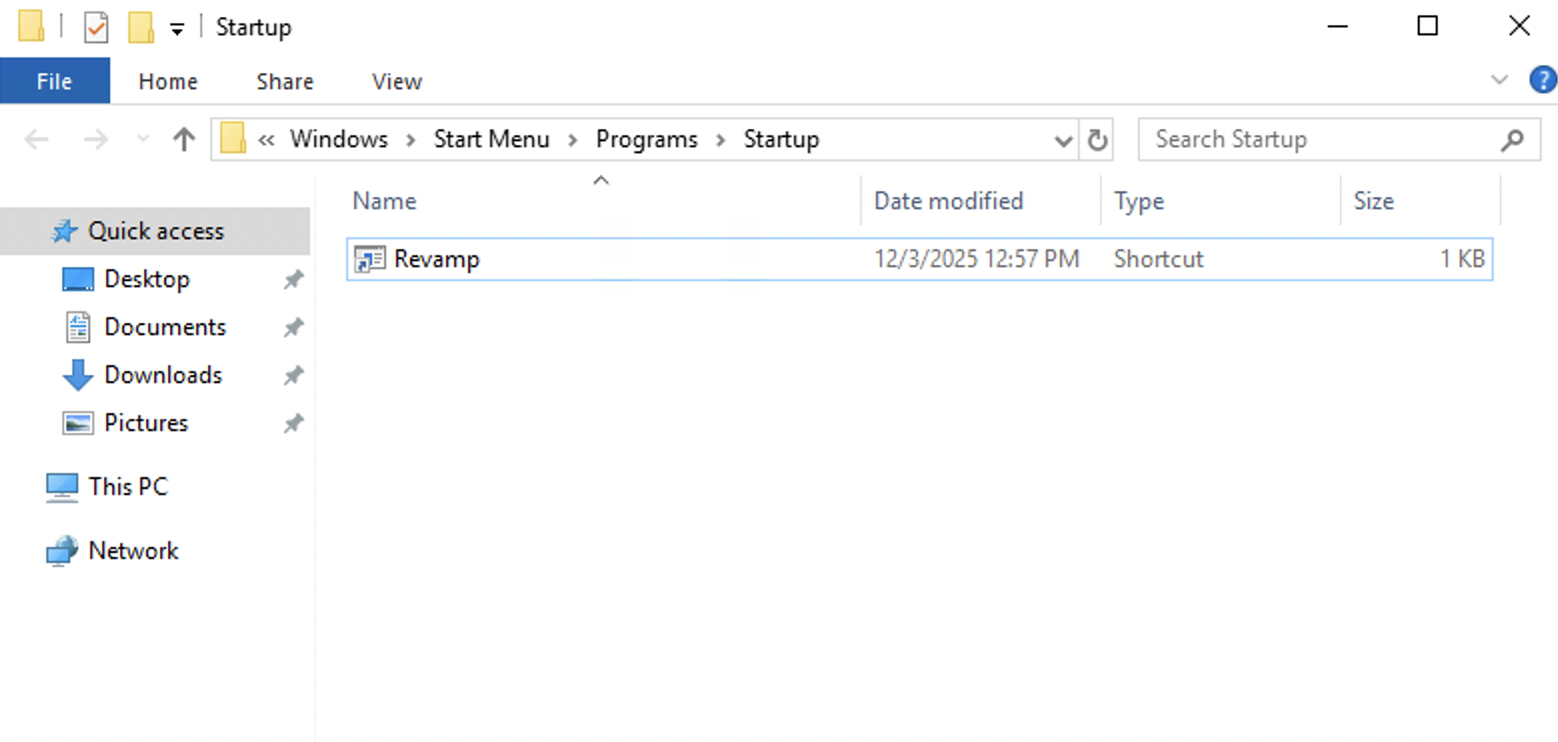
If you open the Task Manager for the attached , you will notice that it doesn't display a Startup tab. You will also not see anything in the Startup tab inside the msconfig utility, as shown above. This is because the attached machine is a Windows server, and Windows servers handle startup applications differently than Windows client systems. Unlike Windows 10 or 11, you will not see startup programs in Task Manager or in the Startup tab of msconfig. On these Windows server machines, the only reliable way to view user-level startup items is through the Startup folder itself. You can access it by pressing Win + R, which opens the Run Dialog, typing shell:startup, and then pressing Enter. This will display all startup programs as shortcuts or executables that are configured to run automatically the next time a user logs in. This is where you can verify applications that are configured to launch at startup. Below is a screenshot of the startup folder from another Windows server (not from the attached VM):
Now coming back to the msconfig. There is a list of various utilities (tools) in the Tools tab here that we can run to configure the operating system further. There is a brief description of each tool to provide some insight into what the tool is for.

Notice the Selected command section. The information in this textbox will change per tool.
To run a tool, we can use the command to launch the tool via the run prompt, command prompt, or by clicking the Launch button.
Advanced System Settings
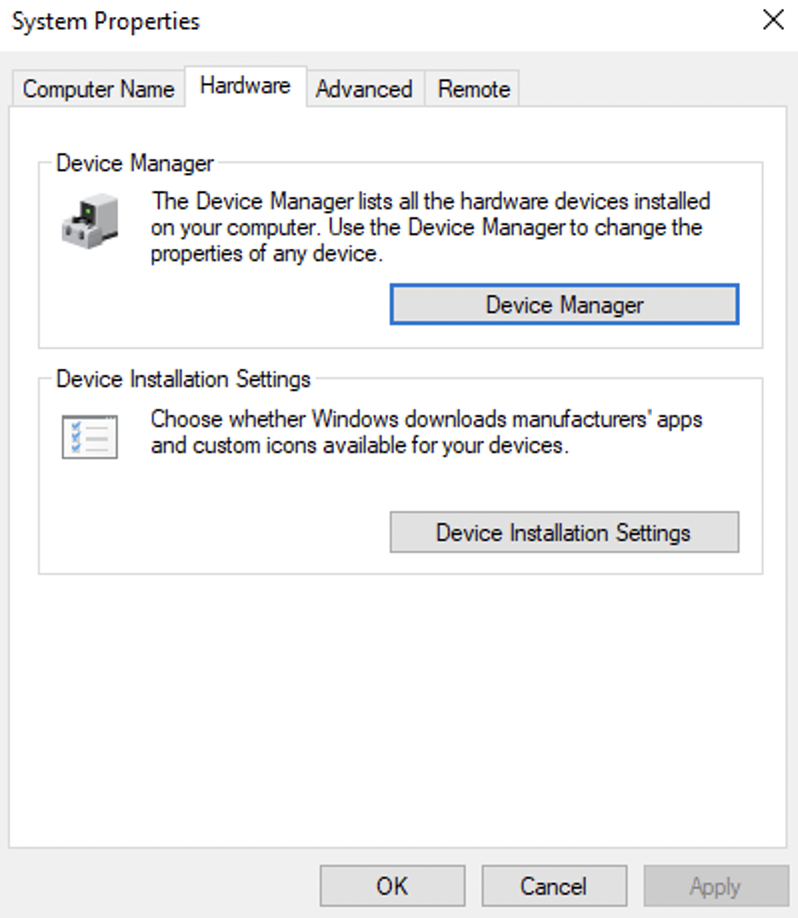
Windows gives you some additional configuration settings as well, which you can use to control the performance behavior and system recovery. To access this option, you can search for View advanced system settings in your search bar and open it. This will open a System Properties panel as shown below:
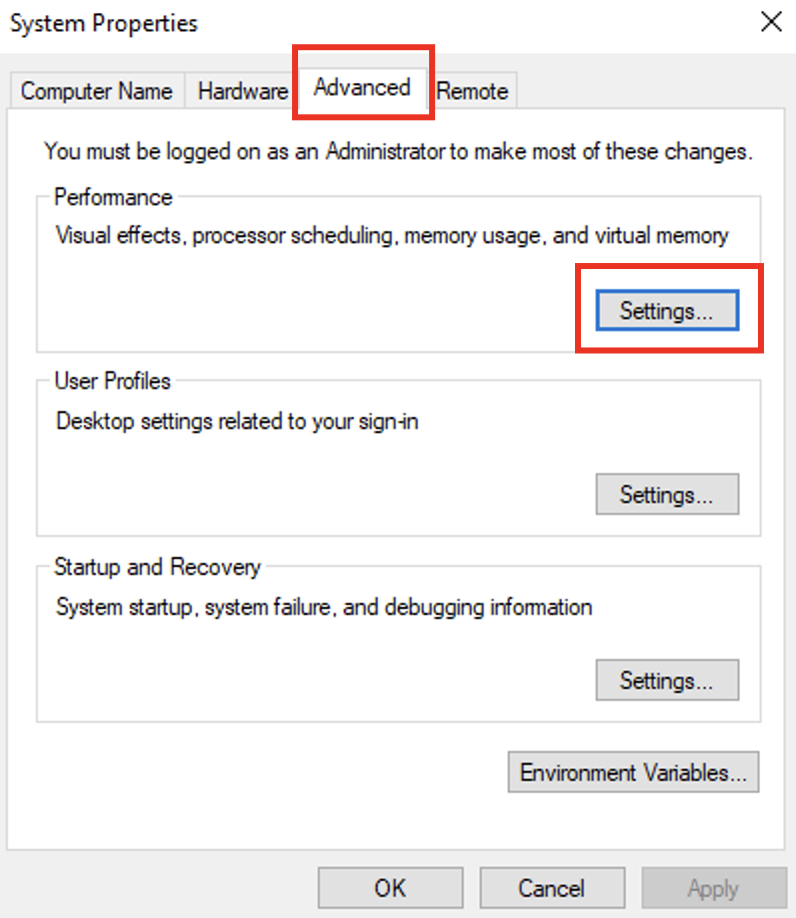
Windows uses a page file as an extra virtual memory space when the physical RAM becomes full. This helps to prevent slowdowns or application crashes when the system runs out of memory. You can view or modify the page file by navigating to the Advanced option at the top and clicking Settings under the Performance tab.
So after clicking the Settings, you will get the Performance Options window, as can be seen below:
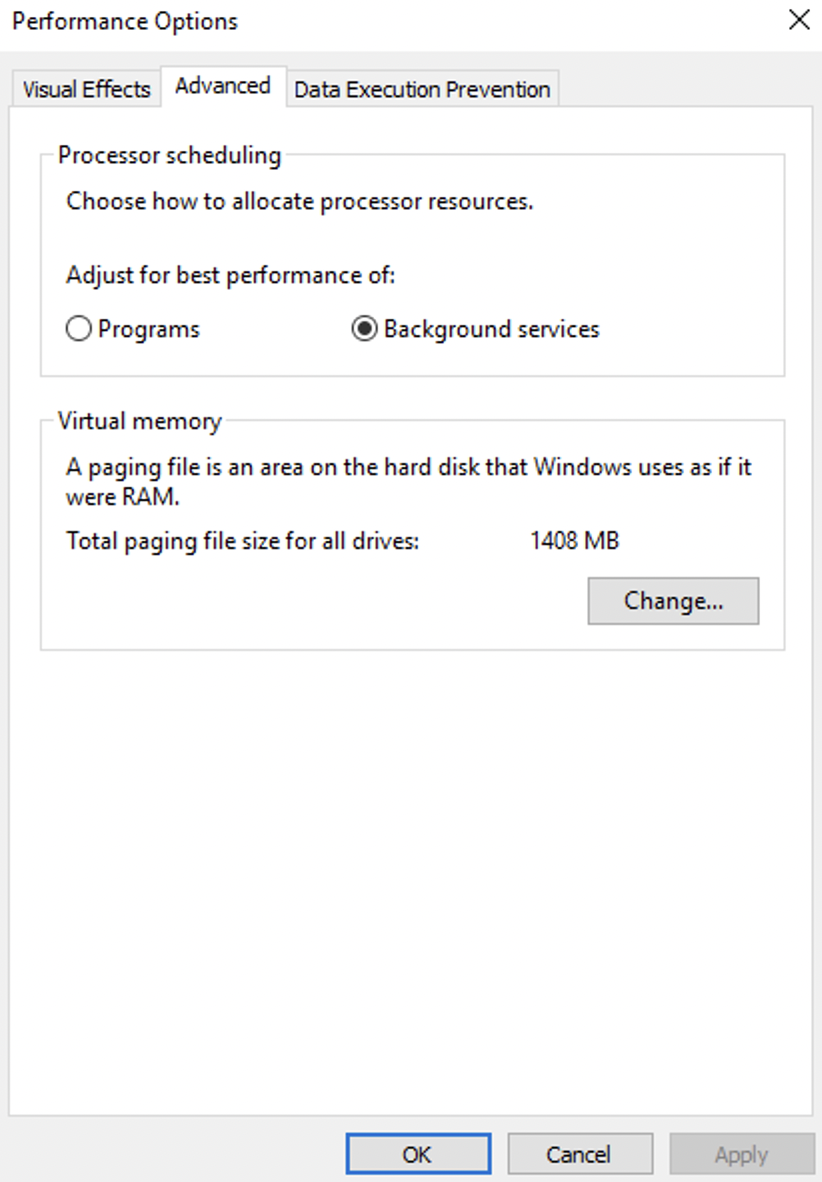
In this Performance tab, the Advanced option can also tell you about the page file size configured for the drives. In this case, it's 1048 MB. The other settings here can give you the following information:
- The drive where the page file is stored
- The initial size (MB)
- The maximum size
- Whether Windows manages the size automatically
There is another cool configuration that you can find in the Advanced System Settings. It is known as Startup and Recovery. Windows can create a crash dump file whenever it encounters a critical error, such as a Blue Screen of Death. This crash dump helps the administrators or analysts understand what went wrong during the crash. You can view or modify the crash dump settings by navigating to the Advanced option at the top and then clicking Settings under the Startup and Recovery section.
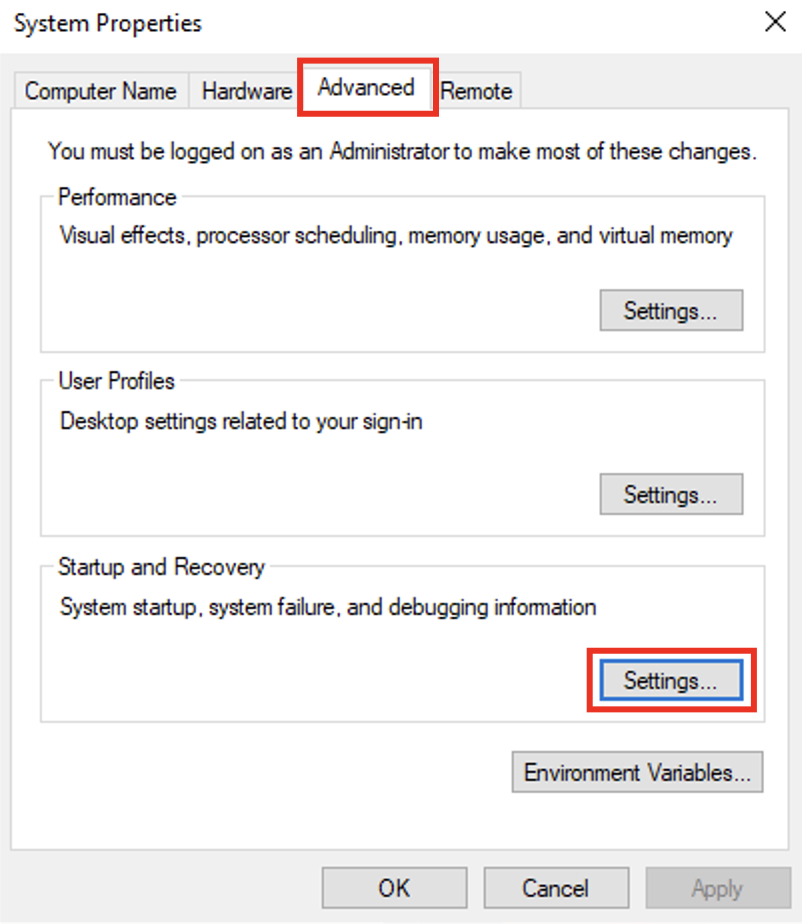
So after clicking the settings, you will see the Startup and Recovery window, as shown below:
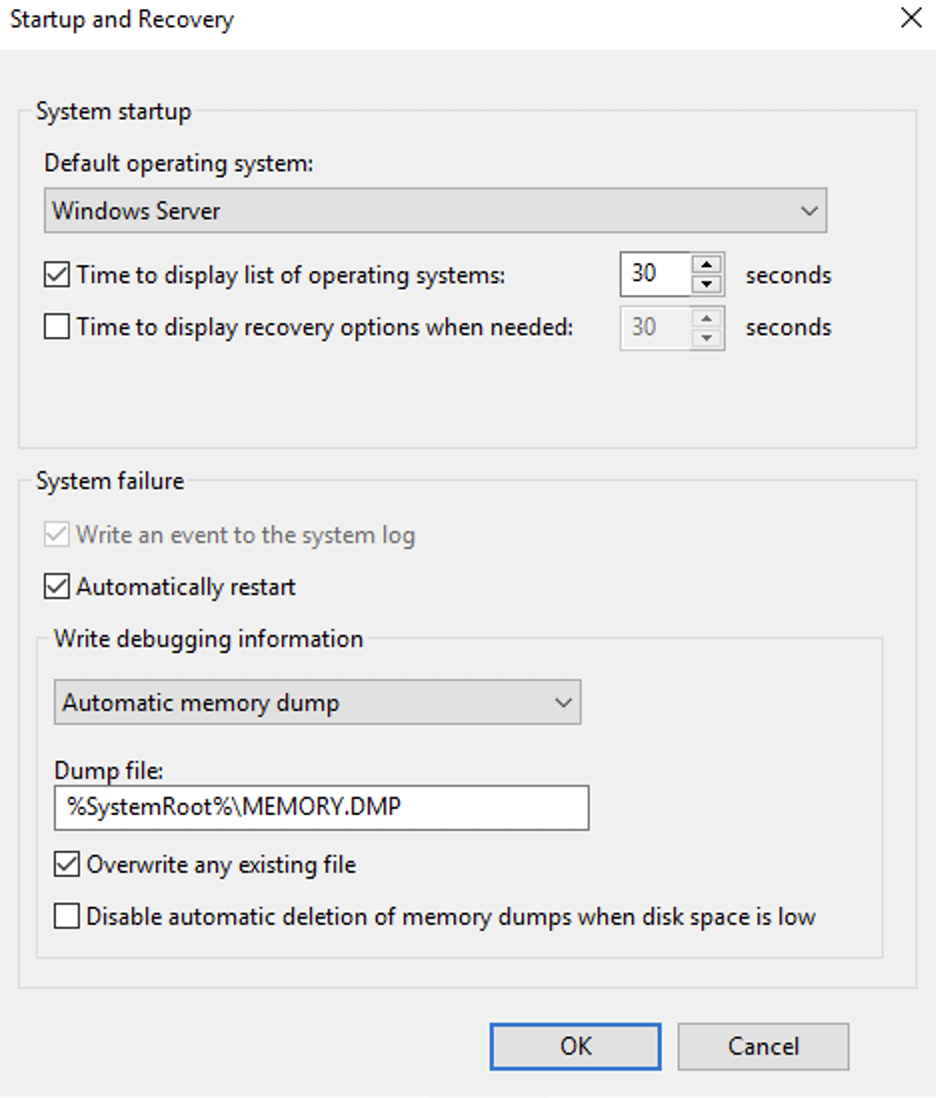
Here, you will find different settings for the startup and recovery. The Write debugging information dropdown tells you the type of crash dump configured for the system. Windows supports different dump types, such as:
- Automatic memory dump
- Kernel memory dump
- Small memory dump (256 KB)
- Complete memory dump
- None
This setting shows how much information Windows will save in the crash dump when a system crash occurs.
Whom is the Windows license registered to?
What command will open the Control Panel? (The answer is the name of .exe, not the full path)
We're continuing with Tools that are available through the System Configuration panel.
User Account Control () was covered in great detail in Windows Fundamentals 1.
The settings can be changed or even turned off entirely (not recommended). You can move the slider to see how the setting will change the settings and Microsoft's stance on the setting.
This slider has four security levels, each of which controls how Windows alerts you when apps or users try to make changes at the system level. They fall into four standard categories as explained below:
-
Always notify: This is the highest security. Windows notifies you whenever any apps or you yourself try to make changes, and the desktop dims (Secure Desktop).
-
Notify for apps: Windows notifies only when apps try to make changes, but not when you change Windows settings. This option is enabled by default.
-
Notify without dimming: Same as above (Notify for apps), but this time the screen does not dim.
-
Never notify: Notifications are turned off. Windows won’t warn you about any changes made by you or any apps.
You can find the current level by looking at the position of the slider in the User Account Control settings window, as shown below:

We're continuing with tools that are available through the System Configuration panel.
The Computer Management (compmgmt) utility has three primary sections: System Tools, Storage, and Services and Applications.
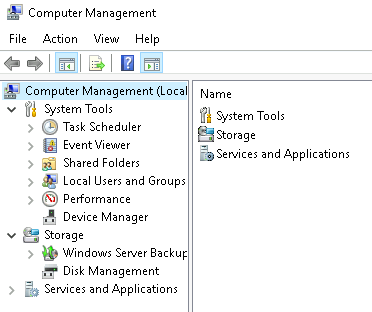
System Tools
Let's start with Task Scheduler. Per Microsoft, with Task Scheduler, we can create and manage common tasks that our computer will carry out automatically at the times we specify.
A task can run an application, a script, etc., and tasks can be configured to run at any point. A task can run at log in or at log off. Tasks can also be configured to run on a specific schedule, for example, every five mins.
To view the scheduled tasks that are present on the system, click Task Scheduler Library. This will display all the scheduled tasks of the system. You can click on any of them to view their details. The screenshot below shows a scheduled task named SystemInfoDailyLog configured to run every day at 10:00 AM. Here, you will see the program or command that will run when the task is triggered.
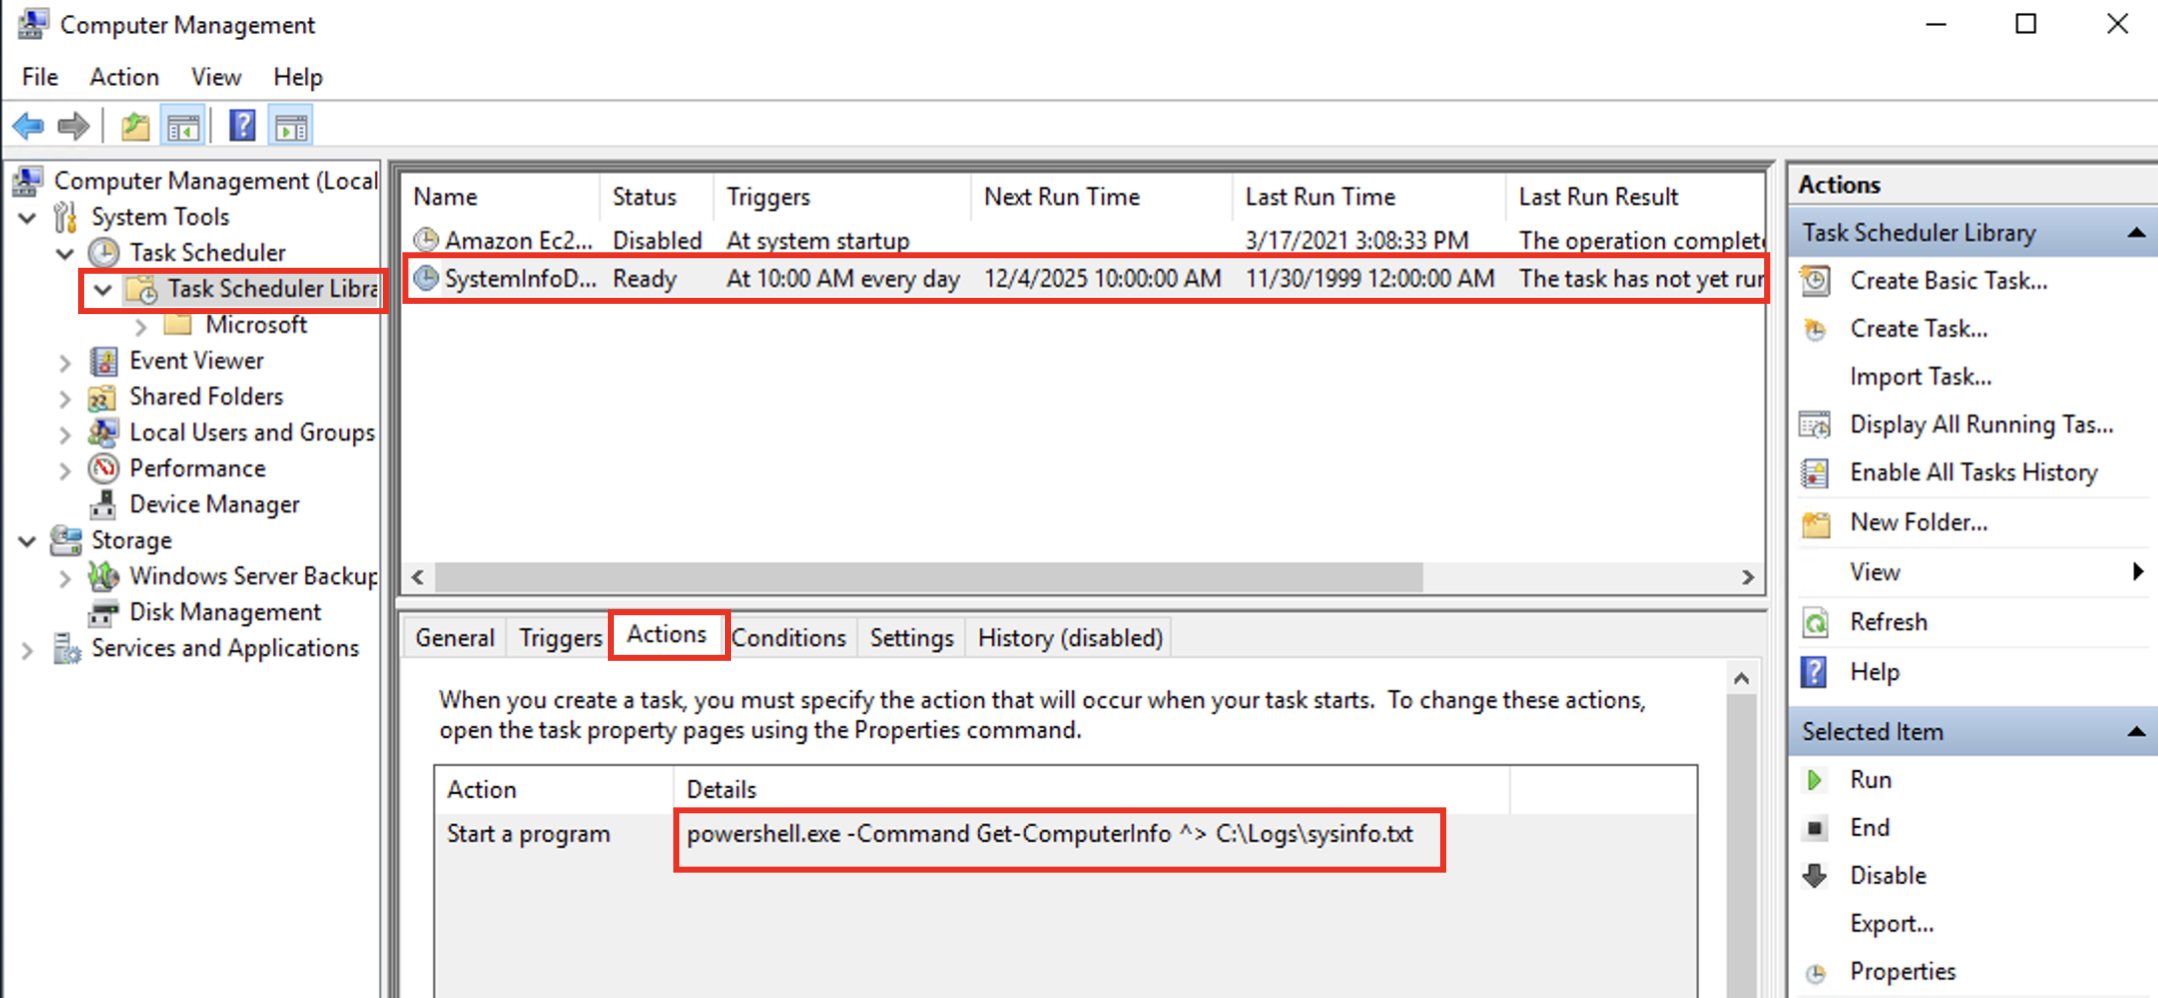
It is also important to note that some scheduled tasks are not recurring and are made to run just once at a specific time. In this case, we would see something like At 2:50 PM on 6/15/2025 as the trigger.
To create a basic task, click on Create Basic Task under Actions (right pane).

Next is Event Viewer.
Event Viewer allows us to view events that have occurred on the computer. These records of events can be seen as an audit trail that can be used to understand the activity of the computer system. This information is often used to diagnose problems and investigate actions executed on the system.

- The pane on the left provides a hierarchical tree listing of the event log providers. (as shown in the image above)
- The pane in the middle will display a general overview and summary of the events specific to a selected provider.
- The pane on the right is the actions pane.
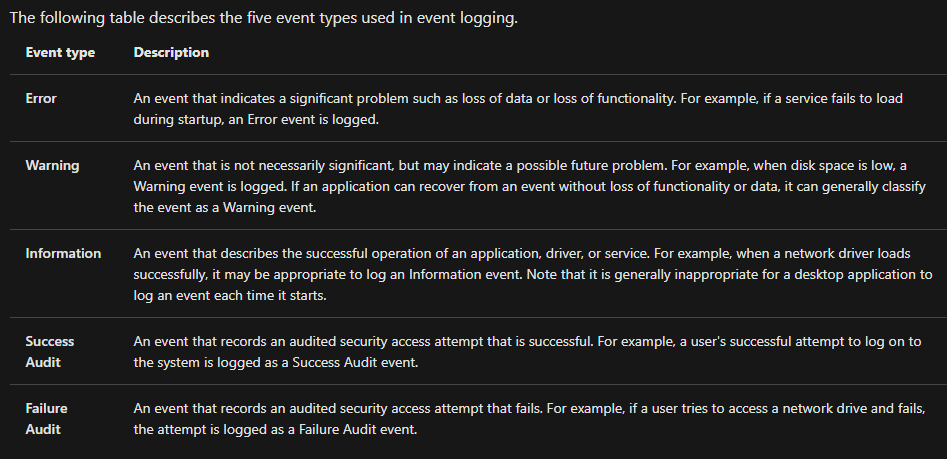
For more information about Event Viewer and Event Logs, please refer to the Windows Event Log room.
Shared Folders is where you will see a complete list of shares and folders shared that others can connect to.

In the above image, under Shares, are the default share of Windows, C$, and default remote administration shares created by Windows, such as ADMIN$.
As with any object in Windows, you can right-click on a folder to view its properties, such as Permissions (who can access the shared resource).
Under Sessions, you will see a list of users who are currently connected to the shares. In this VM, you won't see anybody connected to the shares.
All the folders and/or files that the connected users access will list under Open Files.
The Local Users and Groups section you should be familiar with from Windows Fundamentals 1 because it's lusrmgr.msc.
In Performance, you'll see a utility called Performance Monitor (perfmon).
Perfmon is used to view performance data either in real-time or from a log file. This utility is useful for troubleshooting performance issues on a computer system, whether local or remote.

Device Manager allows us to view and configure the hardware, such as disabling any hardware attached to the computer.

Storage
Under Storage is Windows Server Backup and Disk Management. We'll only look at Disk Management in this room.
Note: Since the lab machine is a Windows Server operating system, there are utilities available that you will typically not see in Windows 10.

Disk Management is a system utility in Windows that enables you to perform advanced storage tasks. Some tasks are:
- Set up a new drive
- Extend a partition
- Shrink a partition
- Assign or change a drive letter (ex. E:)
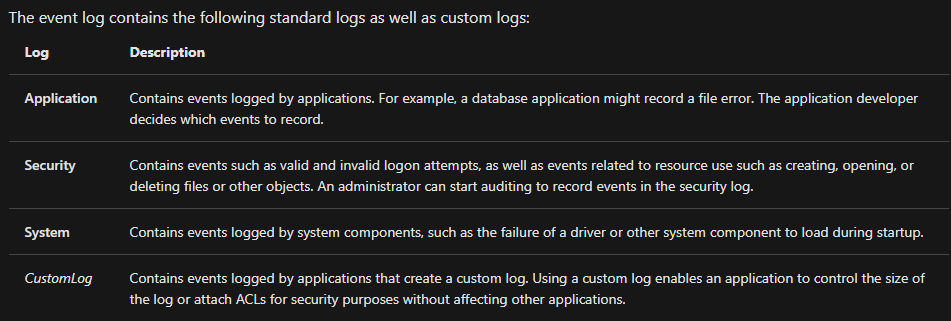
Services and Applications
Recall from the previous task, a service is a special type of application that runs in the background. You can see all the services and their statuses by clicking the Services button given under the Services and Applications section, as shown below:
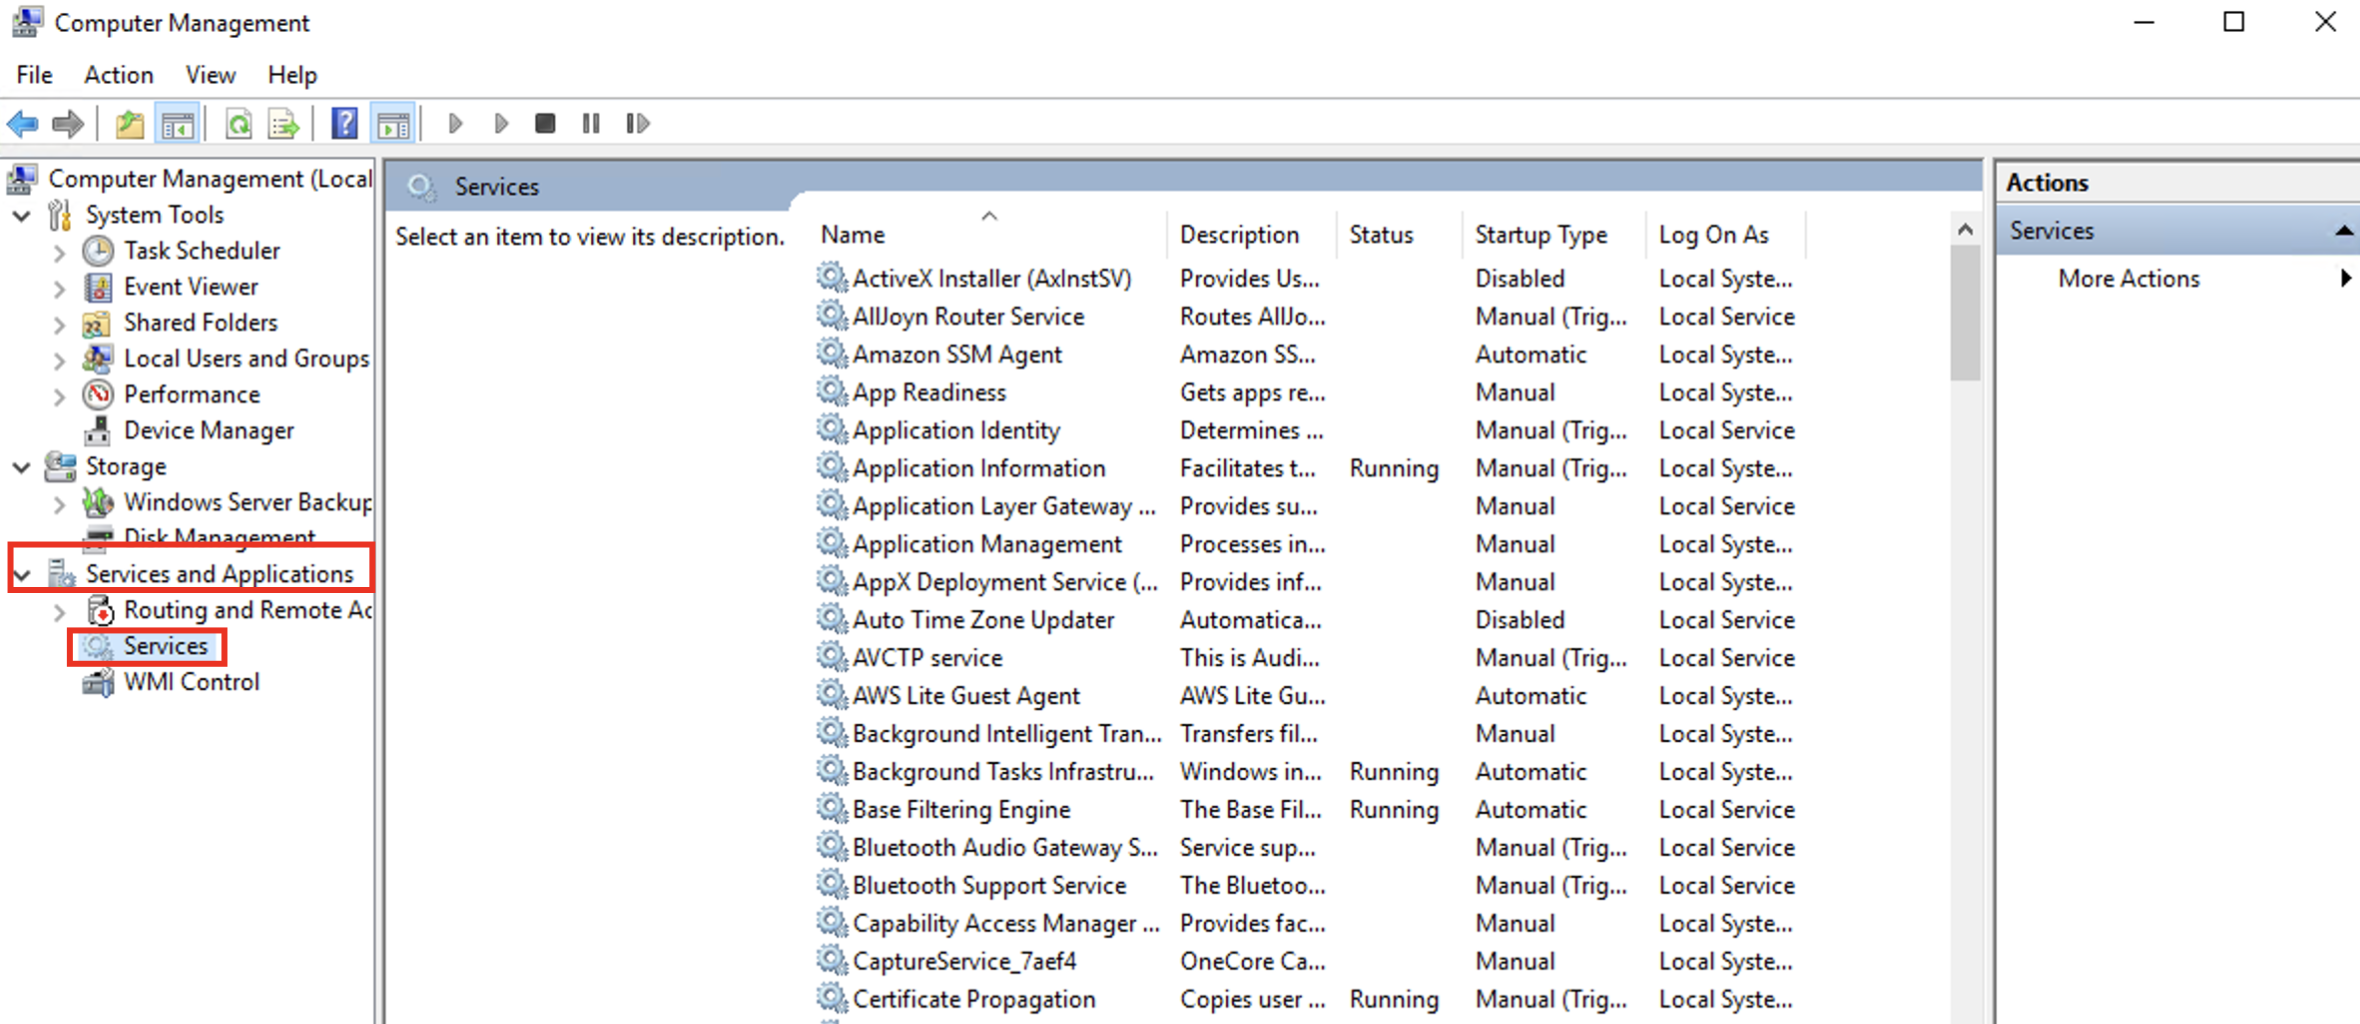
The services shown above have their display names, status, and other values. If you want to get more information about any service, right-click on the service and click properties. Here, you will see additional details, such as the service name (which differs from the display name), the path to its executable, its startup type, and other relevant information.
There is a field known as Startup type in a service’s Properties window, as shown above. It determines how and when the service is configured to start. We can set a service to Automatic, which means it starts every time the system boots, or Manual, which means it only starts when another process or user triggers this service, or Disabled, which means it should not run at all. The service shown in the screenshot above is set to Automatic.
Control configures and controls the Windows Management Instrumentation () service.
Per Wikipedia, " allows scripting languages (such as VBScript or Windows ) to manage Microsoft Windows personal computers and servers, both locally and remotely. Microsoft also provides a command-line interface to called Windows Management Instrumentation Command-line (WMIC)."
Note: The WMIC tool is deprecated in Windows 10, version 21H1. Windows supersedes this tool for .
What is the command to open Computer Management?
(The answer is the name of the .msc file, not the full path)
When is the npcapwatchdog scheduled task set to run at?
What is the name of the hidden folder that is shared?
We're continuing with Tools that are available through the System Configuration panel.
What is the System Information (msinfo32) tool?
Per Microsoft, "Windows includes a tool called Microsoft System Information (Msinfo32.exe). This tool gathers information about your computer and displays a comprehensive view of your hardware, system components, and software environment, which you can use to diagnose computer issues."
The information in System Summary is divided into three sections:
- Hardware Resources
- Components
- Software Environment
System Summary will display general technical specifications for the computer, such as processor brand and model.

The information displayed in Hardware Resources is not for the average computer user. If you want to learn more about this section, refer to the official Microsoft page (opens in new tab).

Under Components, you can see specific information about the hardware devices installed on the computer. Some sections don't show any information, but some sections do, such as Display and Input.

In the Software Environment section, you can see information about software baked into the operating system and software you have installed. Other details are visible in this section as well, such as the Environment Variables and Network Connections.

Recall from the Windows Fundamentals 1 room (The Windows\System32 Folder task) where Environment Variables was briefly touched on.
Per Microsoft (opens in new tab), "Environment variables store information about the operating system environment. This information includes details such as the operating system path, the number of processors used by the operating system, and the location of temporary folders.
The environment variables store data that is used by the operating system and other programs. For example, the WINDIR environment variable contains the location of the Windows installation directory. Programs can query the value of this variable to determine where Windows operating system files are located".
Click on Environment Variables to see the assigned values for the lab machine.

Another method to view environment variables is Control Panel > System and Security > System > Advanced system settings > Environment Variables OR Settings > System > About > system info > Advanced system settings > Environment Variables.

The detour is over. Let's redirect our attention back to msinfo32 and pick up where we left off.
Towards the very bottom of this utility, there is a search bar. Please give it a go. Select Components and search for IP address.

What is listed under System Name?
We're continuing with Tools that are available through the System Configuration panel.
What is Resource Monitor (resmon)?
Per Microsoft, "Resource Monitor displays per-process and aggregate , memory, disk, and network usage information, in addition to providing details about which processes are using individual file handles and modules. Advanced filtering allows users to isolate the data related to one or more processes (either applications or services), start, stop, pause, and resume services, and close unresponsive applications from the user interface. It also includes a process analysis feature that can help identify deadlocked processes and file locking conflicts so that the user can attempt to resolve the conflict instead of closing an application and potentially losing data."
As some of the other tools mentioned in this room, this utility is geared primarily to advanced users who need to perform advanced troubleshooting on the computer system.
In the Overview tab, Resmon has four sections:
- Disk
- Network
- Memory

The same four sections have corresponding tabs across the top. See below.

Note that each tab has additional information for each. An image is shown below for each tab.

Memory

Disk

Network

Although not captured in any of the images above, Resource Monitor has a pane at the far right. This pane shows a graphical view in real-time for each section.
Note: The information displayed in Resource Monitor will be different for you compared to the images above.
We're continuing with Tools that are available through the System Configuration panel.
The command prompt (cmd) can seem daunting at first, but it's really not that bad once you understand how to interact with it.
In early operating systems, the command line was the sole way to interact with the operating system.
When the GUI (graphical user interface) was introduced, it allowed users to perform complex tasks with a few clicks of a button instead of entering commands in the command prompt.
Even though the GUI is the primary way to interact with the operating system, a computer user can still interact via the command prompt.
In this task, we'll only cover a few commands that a computer user can run in the command prompt to obtain information about the computer system.
Let's start with a few simple commands, such as hostname and whoami.
The command hostname will output the computer name.

The command whoami will output the name of the logged-in user.

Next, let's look at some commands that are useful when troubleshooting.
A command used often is ipconfig. This command will show the network address settings for the computer.

Each command will have a help manual to explain the expected syntax to execute the command properly, along with any additional parameters that can be added to the command to expand its execution.
A command to retrieve the help manual for a command is /?.
For example, to see the help manual for ipconfig, you can use the following command: ipconfig /?

Note: To clear the command prompt screen, the command is cls.
The next command is netstat. Per the help manual, this command will display protocol statistics and current TCP/IP network connections.

In the above image, the line within the red box shows us an example syntax for the command.
The structure tells us the netstat command can be run alone or with parameters, such as -a, -b, -e, etc.
When any of the parameters are appended to the root command, netstat in this case, the output changes. Play with a few to see for yourself.
The net command is primarily used to manage network resources. This command supports sub-commands.
If you type net without a sub-command, the output will show the syntax for the root command showing a few of the sub-commands you can use.

For the net command, to display the help manual /? will not work. In this case, you need to use different syntax, which is net help.

So, if you wish to see the help information for net user , the command is net help user.

You can use the same command to view the help information for other useful net sub-commands, such as localgroup, use, share, and session.
Refer to the following link to see a comprehensive list of commands you can execute in the command prompt here (opens in new tab).
For the ipconfig command, how do you show detailed information?
We're continuing with Tools that are available through the System Configuration panel.
The Windows Registry (per Microsoft) is a central hierarchical database used to store information necessary to configure the system for one or more users, applications, and hardware devices.
The registry contains information that Windows continually references during operation, such as:
- Profiles for each user
- Applications installed on the computer and the types of documents that each can create
- Property sheet settings for folders and application icons
- What hardware exists on the system
- The ports that are being used.
Warning: The registry is for advanced computer users. Making changes to the registry can affect normal computer operations.
There are various ways to view/edit the registry. One way is to use the Registry Editor (regedit).

Refer to the following Microsoft documentation here (opens in new tab) to learn more about the Windows Registry.
Recall that the tasks covered in this room were some of the tools that can launch from MSConfig.
Throughout the room, commands and shortcuts were shared for the utilities. This means you don't have to launch MSConfig to run these utilities.
You can also run some of these utilities directly from the Start Menu. See below where some of these utilities can be found.

Some of the tools listed in MSConfig that weren't mentioned in this room were either covered in Windows Fundamentals 1 or were left for you to explore on your own.
Ready to learn Cyber Security?
TryHackMe provides free online cyber security training to secure jobs & upskill through a fun, interactive learning environment.
Already have an account? Log in