
Entra ID Monitoring
Learn the main threats and defenses in Entra ID environments and how to detect them.
medium

To access material, start machines and answer questions login.
Identity-based attacks are now the dominant initial access path in cloud environments. According to Microsoft's (opens in new tab)own telemetry, over 99% of account compromise attacks are preventable with basic controls like , yet attackers continue to succeed because misconfigurations and policy gaps remain widespread.
This room walks through the most common attack techniques targeting Entra ID identities: how they work, what they leave behind in logs, and how to hunt for them with logs.
Learning Objectives
By the end of this room, you will be able to:
- Understand common attack techniques targeting Entra ID identities.
- Understand how Entra ID security features can help prevent or detect these attacks.
- Learn how to use Sign-in and Audit logs to detect each technique.
Prerequisites
Lab Access
Start the lab by clicking the Start Machine button below. You will then have access to the Web Interface. Please wait 4-5 minutes for the instance to launch.
To access , please wait for the to start and follow this link:
Please wait 4-5 minutes for the instance to launch. Ensure to use ’s All Time range for every search.
Each task has its own index and log dataset in , so ensure you filter for the correct index with the task number to answer the questions properly.
For example, use index=task-2 to answer questions for task 2.
Set up your virtual environment

Ready to learn!
Stolen credentials are cheap. Credential-dumping sites and breach databases provide attackers with ready-made lists of real usernames and passwords. Many of these credentials are tied to active corporate accounts where users have reused passwords from personal services.
Entra ID is an especially attractive target because its authentication endpoints are internet-exposed by design. Any attacker with a username list can start attempting logins without ever touching the target's network perimeter. And when a login succeeds, it can look identical to a legitimate one, with no exploit, no malware, and no network anomalies. The only way to catch it is through log analysis.
Password Spraying
The attacker tries a small set of common passwords against many accounts. The goal is to stay under the lockout thresholds.
Lockout thresholds are protection policies that lock accounts after reaching a pre-defined number of failed attempts. When a user is locked, they can't access their account until an admin or a defined timeout unlocks the account.
For example, if the policy is set to lock the account after 10 failed attempts, the attacker never exceeds 5 per account to stay stealthy. The volume is spread across accounts rather than concentrated in a single account.
How it looks in logs:
- Many failed sign-ins from the same IP address.
- Failures spread across multiple different usernames.
- All attempts occur within a short time window.
Brute Force
On the other hand, in brute-force attacks, the attacker tries many passwords against a single account. This technique is less common against Entra ID due to the lockout policies. However, attackers can bypass this by throttling their attempts and spreading them over a long period, so they never exceed the lockout threshold.
For example, an attacker might try just one password per hour against the same account. This keeps the noise low enough to avoid triggering a lockout, making it slow and harder to detect because the attempts may a longer time window.
How it looks in logs:
- Many failed sign-ins against a single username.
- High volume of attempts from a single IP or a small number of .
Detecting With Logs
To filter failure attempts in Sign-in logs, you can use the query below. Note that you are also filtering out conditionalAccessStatus that are not equal to success. This is necessary because a successful authentication can have error codes in some steps of the login process.
| List all failed sign-in attempts |
|---|
|
This query lists only failure attempts against Entra ID identities; however, you can leverage Splunk's (or any other SIEM's) query features to identify brute-force or password-spraying patterns better.
For example, the query below can reveal which IP address has the most failure attempts and how many accounts were targeted:
| List failed sign-in attempts by IP address |
|---|
|
After identifying an IP address executing these techniques or a relevant account being targeted, you can specifically filter for these artifacts to investigate the suspicious behavior.
A good starting point is to check whether any authentication has been successful using the queries below by just replacing the placeholders <TARGET-USER> and <SUSPICIOUS_IP> with the user and IP address you want to investigate:
| List successful logins by user |
|---|
|
| List successful logins by IP address |
|---|
|
Practice
For this task, you will answer a couple of questions about brute-force and password-spraying attacks using Sign-in logs in Splunk logs.
With the filter index="task-2" sourcetype="azure:aad:signin", you will be able to see all Sign-in logs, but feel free to use any other queries you learned in this task.
Remember to search for All Time to find all log activity.
Which IP address is performing a password spraying?
Which IP address is performing a throttling brute force?
What is the user's email address that was compromised?
A successful password spray can give an attacker valid credentials. What stops them from walking straight in?
In most Entra ID tenants, the answer is a combination of two controls: Conditional Access Policies and Identity Protection. Understanding both and their blind spots is essential for a analyst because attackers actively look for gaps in these controls, and your logs will tell you when they find one.
Conditional Access Policies
Think of Conditional Access Policies (CAP) as Entra ID's if/then engine. Every sign-in is evaluated against a set of policies, and based on the policy's findings, it either grants access, requires an additional control (such as ), or blocks the request entirely.
For example, if a company has users only in London and São Paulo, and a user authenticates from New York, the user must complete an validation before successfully accessing their account.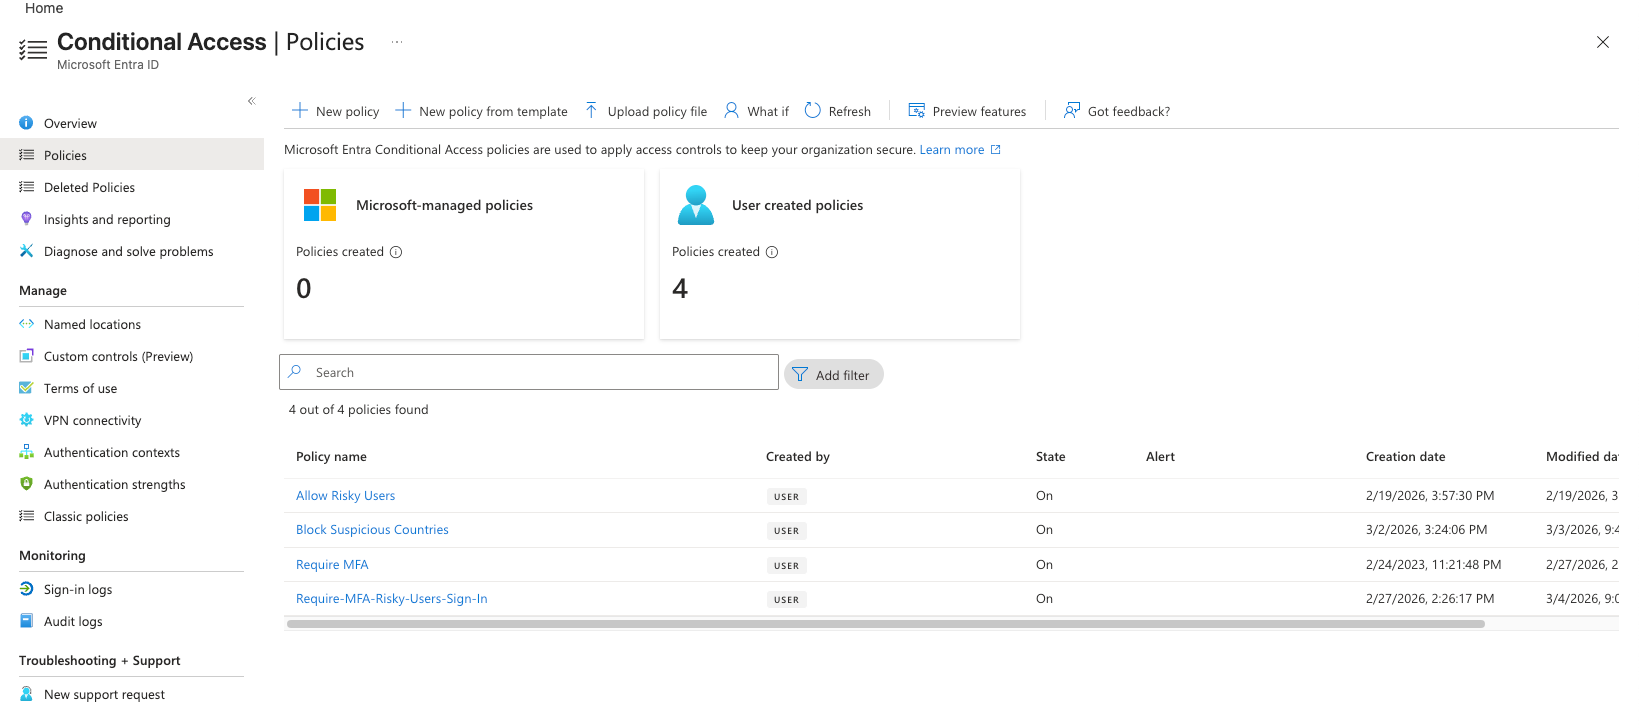
Common Policy Examples
| Policy | What it does |
|---|---|
| Require for all users | Forces for every interactive sign-in. |
| Block legacy authentication | Prevents clients that can't perform . (, , older Office clients) |
| Block sign-ins from risky locations | Restricts access from anonymous proxies, Tor exit nodes, or untrusted countries. |
| Require compliant device | Blocks sign-ins from personal or unmanaged devices. Only devices enrolled in and meeting the company's security standards are allowed. |
| Risk-based block | Blocks or restricts access when Identity Protection detects a high-risk sign-in or account. |
It's important to mention that a policy is only as effective as its scope. If it doesn't cover the right accounts and conditions, it leaves gaps that attackers actively look for.
A real-world example of this is when an organization has a policy requiring for all users, but excludes a handful of service accounts to avoid breaking automated workflows. If one of those accounts is later targeted in a password spray attack, there's nothing standing between the attacker and a successful login.
CAP in Sign-in Logs
Every Sign-in log event includes an appliedConditionalAccessPolicies field that tells you exactly which policies were evaluated, and what the outcome was for each:
   appDisplayName: "One Outlook Web"
   appId: "9199bf20-a13f-4107-85dc-02114787ef48"
   appliedConditionalAccessPolicies: [
     {
       displayName: "Require MFA" // Applied Policy
       enforcedGrantControls: [
         "Block"
       ]
       enforcedSessionControls: [
       ]
       id: "c63499f4-64b6-4943-bfc3-52fbb641ef10"
       result: "notApplied" // Resulted action
     }
   ]
The possible results are:
| Result | Meaning |
|---|---|
success |
Policy conditions were met, and controls were satisfied. |
failure |
Policy blocked, or the required control wasn't satisfied. |
notApplied |
Policy conditions were not met, or the user/app was not in scope. |
reportOnly |
Policy is in audit mode — it would have applied, but didn't enforce. |
You can use the following query to start your hunt for suspicious CAP results:
| List blocked sign-ins by CAP |
|---|
|
Identity Protection
Conditional Access enforces your rules, while Identity Protection is what tells Conditional Access when something looks suspicious in the first place.
Identity Protection is Entra ID's built-in ML-based risk detection engine. It continuously analyses sign-in behaviour and user account signals, assigns risk scores, and feeds those scores into Conditional Access so risk-based policies can act on them.
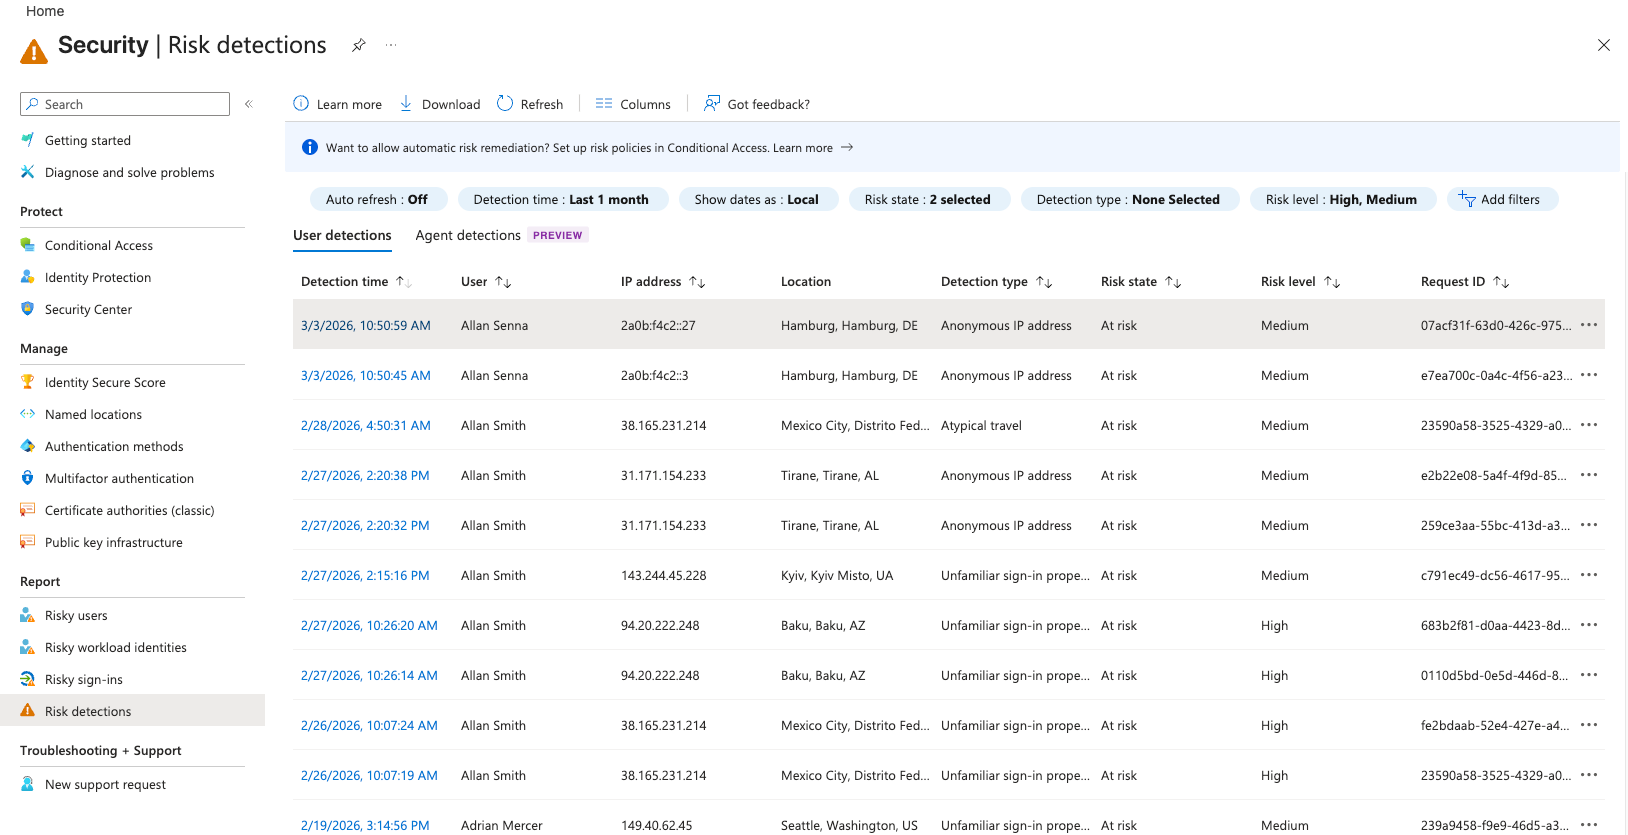
There are two types of risk: Sign-in Risk and User Risk.
Both types of risk use a three-tier scale: Low, Medium, High.
Sign-in Risk
It evaluates the suspiciousness of a specific sign-in attempt.
This is evaluated in real time, per authentication event. Below are examples of what raises sign-in risk:
- Suspicious Source IP: Sign-in from a known risky or anonymous IP. (e.g., Tor, known proxy services, or VPN providers)
- Impossible Travel: Two sign-ins from geographically distant locations within an impossible timeframe. (e.g., First login from London and after 5 minutes, a login from New York)
- Unfamiliar Sign-in Properties: New device, new location, or new ASN that doesn't match the user's historical pattern.
This Microsoft page (opens in new tab) documents all risk types.
User Risk
It evaluates the likelihood that a specific account will be compromised.
This accumulates over time, based on the account's history. Examples:
- Leaked credentials: Validates if the account's password appeared in a known breach dump.
- Multiple high-risk sign-ins: Check related risky sign-ins that weren't remediated.
- Suspicious M365 activity: Check potential post-compromise M365 activity. (e.g., Suspicious inbox-rules)
Identity Protection in Sign-in Logs
You can look for Identity Protection log details in three different sourcetype values:
Sign-in logs (azure:aad:signin)
To assess the risk level of a specific sign-in attempt, you can use the riskLevelDuringSignIn field. For the cumulative risk associated with the user account as a whole, refer to riskLevelAggregated.
Below is a Splunk query that uses these fields to analyse risky sign-ins:
| List high-risk sign-ins |
|---|
|
Risk Detection Logs (azure:aad:riskdetection)
This log type is a detailed log generated when risks are detected. The difference between the regular sign-in log fields is the additional details related to the detection, for example:
riskEventType: The type of the risk identified (e.g., anonymizedIPAddress, impossibleTravel).riskLevel: Shows how risky the detection is.
These logs also generate detections in other usage steps of M365 and Entra ID, for example, a suspicious configuration change performed by an admin. You can check the type of activity that is being alerted by looking at the activity field.
Always validate sign-in logs when you suspect user behavior or when performing proactive threat hunting.
Below are two Splunk queries to analyse risk detection logs:
| List all risk detection logs |
|---|
|
| List all risk detections related to anonymized IPs |
|---|
|
Risky User Logs (azure:aad:identity_protection:risky_user)
Every user has a risk level in Entra ID. This is calculated based on risk detections, and it's a way for Microsoft to alert admins to users who are likely compromised (or almost compromised) and require their attention.
Once a user changes its risk state, a risky user log is generated. This makes this log type a good trigger to perform proactive threat hunting to identify users who are likely compromised.
Below is a Splunk query to filter all risky user logs:
| List all risky user alerts |
|---|
|
Practice
For this task, you will answer a couple of questions to assess the risk of some sign-ins and user accounts using logs.
With the filter index="task-3" sourcetype="azure:aad:signin", you will be able to see all Sign-in logs, but feel free to use any other queries you learned in this task.
Remember to search for All Time to find all log activity.
What is the user email address that is at risk in the tenant?
When was the last risky sign-in attempt from this risky user based on risk detection logs?
Answer Example: 2026-01-01 14:00
What is the type of risk identified during this risky user sign-in based on risk detection logs?
What is the name of the CAP policy that was enforced and blocked some sign-in attempts from this risky user?
What was the IP address that was blocked from signing in this risky user?
is the single most impactful control against password-based attacks. Once an attacker has valid credentials, is the wall between them and a full account takeover. As we mentioned before, Microsoft reports that blocks over 99% of automated credential-based attacks.
How Works in Entra ID
When a user signs in, Entra ID breaks authentication into two sequential challenges:
Something you know: the user enters their username and password. Entra ID validates these credentials against the directory.
Something you have: if the password is correct (and a Conditional Access policy that enforces is active), Entra ID sends a second challenge to a pre-registered method.
Only after both factors are satisfied does Entra ID generate a session token and grant access to the requested resource. Unfortunately, is not a silver bullet. Attackers have developed techniques to bypass it without ever breaking the cryptography. This task covers the most relevant techniques for a analyst to recognise.
Fatigue (Prompt Bombing)
The attacker already has valid credentials. They initiate repeated authentication attempts in rapid succession, each one generating an Authenticator push notification on the victim's phone. The goal is to overwhelm the user until they approve one, out of frustration, confusion, or the mistaken belief that it's a legitimate prompt.
This is a attack, not a technical one. It works because push notifications give the user a single button to approve without any additional context about where the sign-in is coming from.
How it looks in logs:
- A high volume of prompts against a single account in a short window.
- -related error codes, such as
50074,50076,500121, repeated. - If the user approves, followed eventually by error code
0.
Microsoft has partially mitigated this with number matching (the user must enter a number shown on the login screen into their Authenticator app) and additional context (the app shows location and app name). These controls make fatigue attacks significantly harder.
| List MFA failures by user |
|---|
|
SIM Swapping
When SMS is used as the method, an attacker can convince a mobile carrier to port the victim's phone number to a SIM they control, allowing them to receive all SMS codes. This primarily poses a threat to consumer accounts and organizations that still rely on SMS-based . The mitigation is straightforward: move away from SMS as a factor.
In logs, this technique is characterized by:
- A successful logon using an unusual device or browser for a user.
- A successful logon from an unusual location for a user.
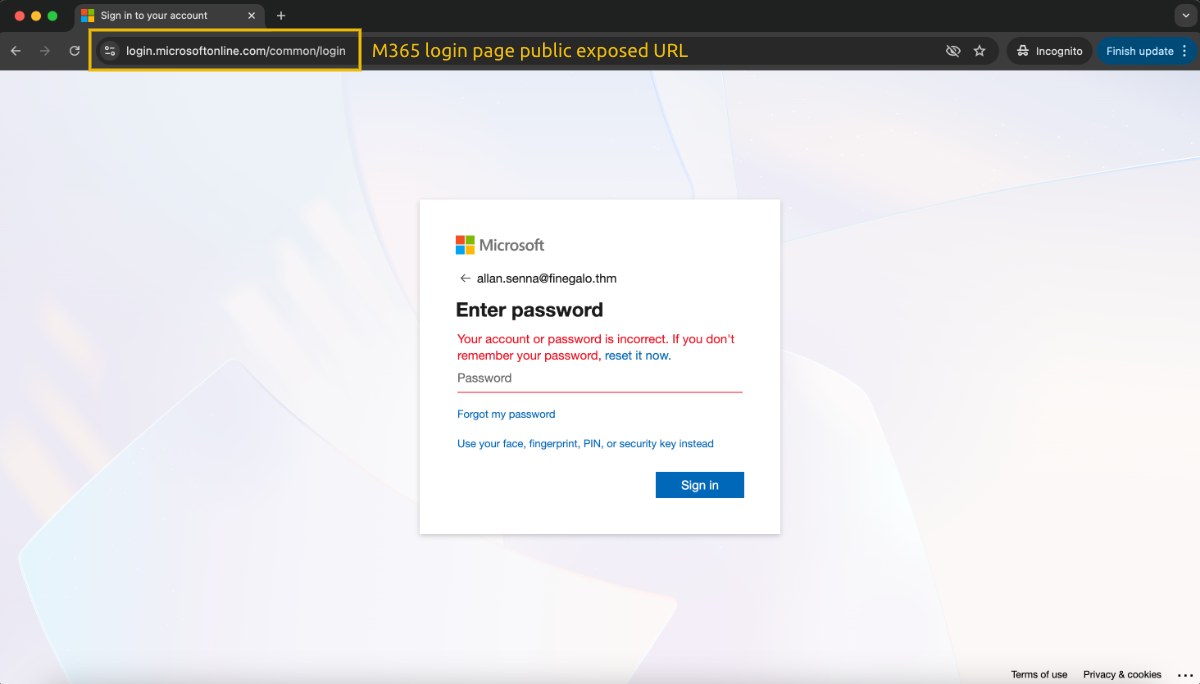
Adversary-in-the-Middle (AiTM) Phishing
AiTM is a more sophisticated technique. The attacker sets up a reverse proxy between the victim and the legitimate Microsoft login page. The victim authenticates normally, including completing , but the proxy captures the session token issued after authentication. The attacker then replays that token on their own machine, bypassing entirely because authentication has already occurred.
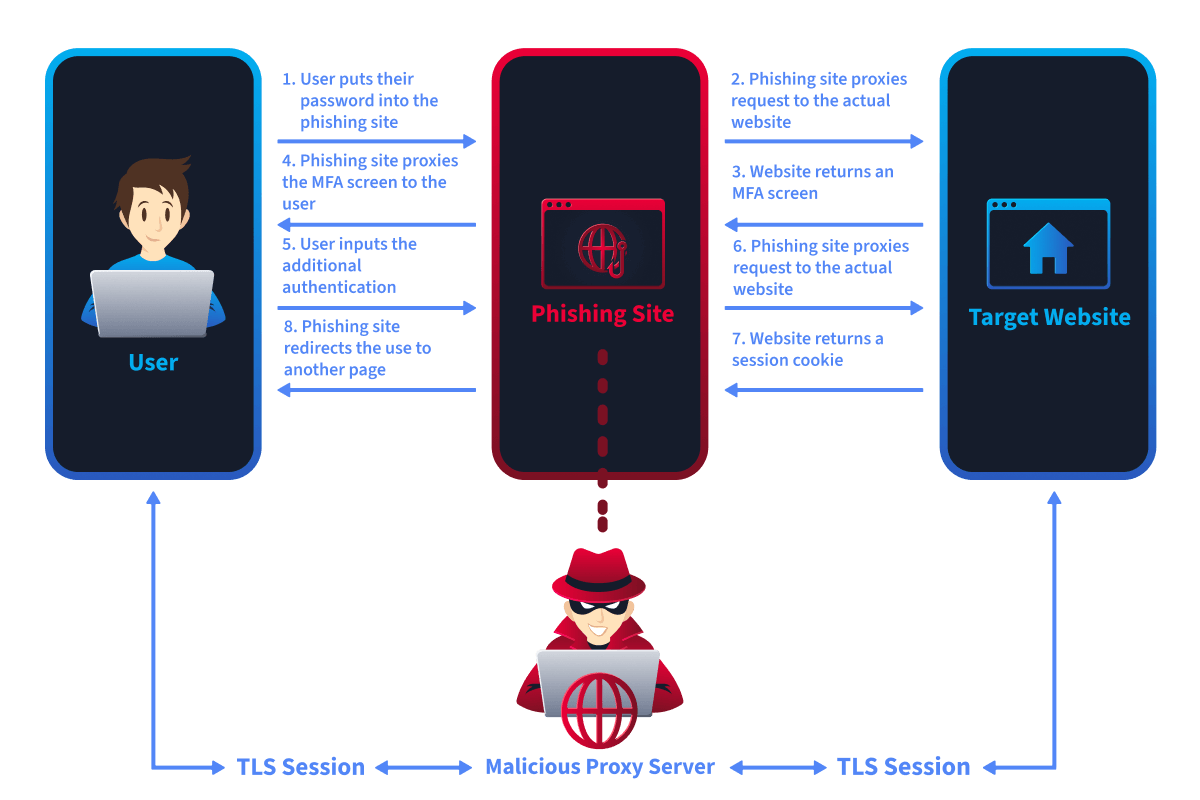
From the token's perspective, the session is legitimate. The attack doesn't break ; it steals the result. The pattern can be described as:
- The sign-in succeeds without a new prompt because the token already carries proof that was completed during the original (victim's) authentication.
- The source IP and location differ from those where was originally completed.
- Conditional Access shows the session as compliant. The policy was satisfied, just not by the person who's now using the token.
This is why token theft is so dangerous: from Entra ID's perspective, everything looks fine. The only anomalies are geography and IP, which require an analyst to connect the dots between two separate sign-in events.
Impossible Travel
You may have noticed that an attacker who has bypassed authentication, whether through SIM Swapping or by stealing a session token (AiTM), often ends up authenticating from a location that makes no physical sense relative to the user's last known sign-in location. This is the basis for one of the most reliable detection signals in Entra ID: impossible travel.
For example: a user signs in from São Paulo at 09:00, and then the same account signs in from Moscow at 09:45. That's physically impossible. One of those sign-ins is unlikely to be performed by the legitimate user.
Identity Protection tries to detect this automatically and flags it as an impossibleTravel risk event. But as we mentioned before, you can't blindly trust these alerts, since sometimes they aren't accurate. You can hunt for this pattern proactively, directly in Sign-in logs, by using the Splunk query below and trying to spot logins from different countries in a timestamp that is physically impossible:
| List successful sign-in activity for a user |
|---|
|
| List "impossibleTravel" alerts in Identity Protection logs |
|---|
|
Legitimate False Positives
Not every impossible travel event is malicious. Before confirming an incident, you may consider:
- Corporate VPNs — A user connecting through a VPN exit node in another country will appear to sign in from that country, even while sitting in their office.
- Split tunnelling — Some traffic goes through the VPN, some doesn't, producing sign-ins from multiple apparent locations simultaneously.
- Cloud service IPs — Automated sign-ins from Microsoft services or third-party integrations can produce location anomalies.
Practice
For this task, you will answer a couple of questions to identify an MFA bypass attempt using Splunk logs.
With the filter index="task-4" sourcetype="azure:aad:signin", you will be able to see all Sign-in logs, but feel free to use any other queries you learned in this task.
Remember to search for All Time to find all log activity.
Which user was the target of an MFA fatigue attack?
What is the error code of the failed MFA prompts?
What is the country code (e.g., UK, MX) that the user normally signs in before the attack?
When does the attacker successfully authenticate in the user account?
Answer Example: 2026-01-01 15:20
Getting into an account is only the first step. Once an attacker has a foothold, their next priority is two things: expand their access and make sure they can keep it even if the compromised account is locked out or its password is reset.
This task introduces the most common post-compromise actions that an attacker takes in Entra ID. The focus here is on recognition, knowing what to look for in Audit logs.
Common Post-Compromise Techniques
You may have noticed that everything up to this point has lived in Sign-in logs. Once the attacker is authenticated and begins taking action within the tenant, the relevant evidence is moved to Audit Logs.
Audit logs capture administrative actions and any changes to the tenant's state. Role assignments, user creation, policy modifications. All changes land there.
Once you suspect a user is compromised, the key filtering field is activityDisplayName, which indicates the action the user performed.
To filter all audit logs performed in a tenant, you can use the following Splunk query:
| List all audit logs |
|---|
|
In the previous room, M365 Monitoring Basics, you learned details about the most important fields in audit logs. But in short, the main fields you should pay attention to in an investigation of post-compromise activity are:
activityDisplayName: The detailed activity or action that was performed by a user or app.initiatedBy: The account or app that performed the action.targetResources: The account or objects that have been changed or affected by an action.
These fields answer the most important question for analyzing post-compromise activity: what was changed (activityDisplayName), who made that change (initiatedBy), and the details of the changes (targetResources).
Keep that in mind to answer the task practice questions.
Role Assignment
This is the most direct path to elevated access: assign a privileged Entra ID role to the compromised account (or to a new account the attacker creates). Below are common target roles:
- Global Administrator: Full control over the tenant.
- Exchange Administrator: Access to all mailboxes.
- User Administrator: Can reset passwords and modify accounts.
- Application Administrator: Can manage app registrations and consent grants.
A legitimate role assignment isn't inherently suspicious. What's suspicious is a role assignment that happens outside normal provisioning workflows. For example, at an unusual time, initiated by an account that doesn't normally perform these actions, targeting an account that was recently involved in suspicious sign-in activity
Use the query below to list all assigned role activities in a tenant. Remember to explore the targetResources field to see what role was added to a user:
| List all assigned role activities |
|---|
|
Creating Backdoor Accounts
A new admin account created outside normal HR/IT provisioning flows is a classic example of a persistence mechanism. The attacker creates it, assigns it a privileged role, and uses it as a fallback if the original compromised account is remediated.
Use the Splunk query below to list all accounts created within a tenant:
| List all user creation activities |
|---|
|
Adding Alternate MFA Methods
If an attacker registers their own authenticator app or phone number on the compromised account, they maintain access even after the victim changes their password, since they control the MFA factor. This shows up in Audit logs as an MFA registration event on a user object, initiated by the user themselves.
When onboarding an MFA device, it can generate multiple types of logs for each step. To validate if a user attempted to add an MFA device to their account, you can use the query below:
| List MFA onboard attempts |
|---|
|
You can explore the additionalDetails field to check what type of device the user added.
Practice
For this task, you will continue the investigation from the MFA bypass task and answer a couple of questions to identify post-compromise activity in the compromised account you have identified using Splunk logs.
With the filter index="task-5", you will be able to see all logs related to this task, but feel free to use any other queries you learned in this room!
Remember to search for All Time to find all log activity.
What is the user email address that the attacker created?
Which role (Role.DisplayName) was assigned to this new account?
When did the attacker add a new MFA device?
Answer Example: 2026-01-01 15:20
Password reset, resets, and account lockouts. A thorough remediation effort can undo most of what an attacker achieved through credential theft. However, there is one persistent mechanism that survives it all: a consented OAuth application.
This task dives deeper into OAuth abuse as a standalone technique. It is one of the stealthiest methods available to an attacker because the access isn't tied to the user's credentials at all. It lives in the application layer, and most organizations are not actively monitoring it.
How OAuth Consent Works
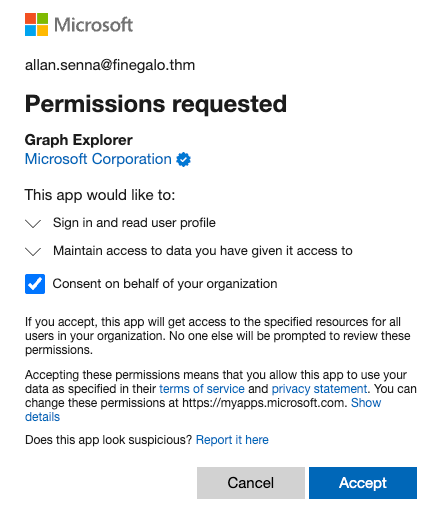
OAuth (Open Authorization) is the protocol that powers the "Sign in with Google" or "Connect your Microsoft account" buttons you see everywhere. It allows a third-party application to request access to a user's resources on a platform, such as M365, without ever handling the user's password. Instead, the user (or an administrator) reviews a consent screen listing what the application wants to do, approves it, and the platform issues an access token granting that application those permissions.
From an attacker's perspective, this is ideal. Once a user or admin clicks "Accept", the application holds a persistent grant to the user's data via . That access:
- Survives password changes, because it's not credential-based.
- Survives resets, because authentication already happened at consent time.
- Requires active revocation, not just credential remediation, to remove.
Delegated vs Application Permissions
Not all consent grants are equal. Microsoft's permission model has two distinct types, and understanding the difference is critical for assessing how dangerous a consent grant is.
| Delegated Permissions | Application Permissions | |
|---|---|---|
| Acts as | The signed-in user | Itself (no user required) |
| Scope | Limited to what that user can access | Tenant-wide, by default |
| Who can consent | The user themselves (for low-risk scopes) or an admin | Admin only |
| Example | Mail.Read — read this user's mail |
Mail.Read.All — read every mailbox in the org |
Delegated permissions are the more common and less alarming of the two. The app borrows the user's identity and can only do what that user could do themselves. If that user leaves the organization, the grant becomes useless.
Application permissions are a different story. They grant the application a standing right to act across the entire tenant, independently of any user session. An app with Mail.Read.All can silently read every mailbox in the organization indefinitely. An app with RoleManagement.ReadWrite.Directory can assign Entra ID roles. These permissions require admin consent precisely because of how powerful they are, which is also why tricking a Global Administrator into granting consent is one of the highest-value moves an attacker can make.
High-Risk Permission Scopes to Know
The following permissions are commonly abused and should be treated as high-priority findings during a hunt:
Mail.Read.All/Mail.ReadWrite.All: Read or modify all mailboxes in the tenant.Files.ReadWrite.All: Read and write all files across SharePoint and OneDrive.RoleManagement.ReadWrite.Directory: Assign and remove Entra ID roles, including Global Administrator.Directory.ReadWrite.All: Read and write all directory data, including users and groups.offline_access: Maintain access indefinitely via refresh tokens, even when the user is not actively signed in.
Any consent grant that includes one or more of these scopes warrants immediate investigation.
Detecting OAuth Abuse in Audit Logs
Consent grant events are captured in Audit logs under the activityDisplayName value "Consent to application". The targetResources field is particularly important here since it contains both the application that was granted consent and the specific permissions that were approved.

When granting permissions to an application generates multiple log entries, the query below filters to the consent event itself and surfaces the fields most relevant to triage:
| List all consent grants to an application |
|---|
|
Which permission allows an application to read all mailboxes within a tenant?
What is the activityDisplayName value you use to track all consent grants to applications within Entra ID audit logs?
Congratulations! You've completed the Entra ID Monitoring room. You now have a solid understanding of what the main threats are and how to identify them using Sign-in and Audit logs.
What You've Learned
- Learned the main attacks that target Entra ID.
- Learned how Conditional Access policies and Identity Protection work together to help admins quickly identify potentially compromised accounts.
- Understand how to use Entra ID Sign-in and Audit logs to detect these threats before compromising an account and how to identify post-compromise activities.
In the next room, Exchange Online Monitoring (coming soon), you'll learn about multiple common techniques attackers use when targeting one of the most important M365 applications, the Exchange Online, also known as Outlook Web.
Ready for Exchange Online Monitoring room!
Ready to learn Cyber Security?
TryHackMe provides free online cyber security training to secure jobs & upskill through a fun, interactive learning environment.
Already have an account? Log in